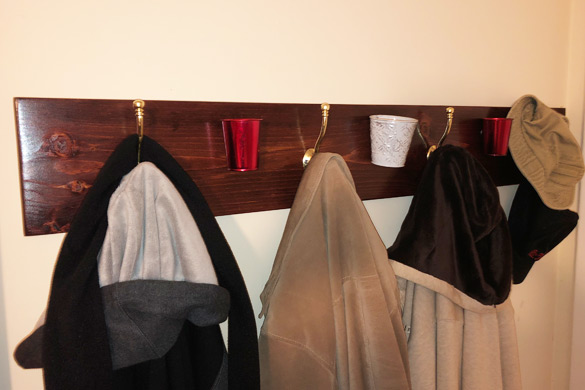
Are you ready to add a personal touch to your home’s décor? A wall-mounted coat rack provides a place, not only to hang your coat but a place to drop off your keys and other pocket contents as you arrive in your home.
homeandgardeningguide.com gathered information and instructions on how to make a DIY wall-mounted coat rack with optional stowing capability.
Wall-Mounted Coat Rack – Location and Space Requirement
The space in which you will mount your coat rack is as essential as the coat rack itself. The last thing you need to do is mount a coat rack that blocks the opening of your door or interferes with traffic entering and exiting your home.
Location – Before you do anything, you need to decide where your coat rack will go.
• Make sure the location is free from obstacles, or that the coat rack will not become an obstacle itself.
• Measure the available space. You will need a minimum of 2 feet 6 inches of clearance below the coat rack to hang coats or other garments.
• The length of the space can be anything from 6 inches (for a single hook and storage tin) to several feet (with multiple hooks, storage tins, and features).
• The width of the coat rack can be as small as 3 to 4 inches or as wide as 12 inches or more (depends on your décor and preference).
Wall-Mounted Coat Rack – Supplies and Tools
Like a recipe for a meal, there are some things you will need to gather and prepare to assemble your wall-mounted coat rack.
The supplies you will need include:
• Wood – Nearly any type of wood will work for this project. Anything from a 2”x4” piece of common wood to a 1”x4” or even a 1”x8” cedar or walnut plank will work (base this selection on the space for the coat rack and décor it will be a part of). Choose wood with little to no dents or damage, and look for grain patterns or knots that will add aesthetic appeal to your project. (most home supply stores will cut a length of wood to size for you).
• Wood Stain – Choose a stain color that compliments your home décor. No need for a large container unless you have multiple projects, as you will only use a few ounces for your coat rack. If you prefer the natural wood look, no stain is required.
• Varnish – There are many types of varnish or finishing coats that will add shine and texture to your wood. Choose the finish best suited for your home’s décor.
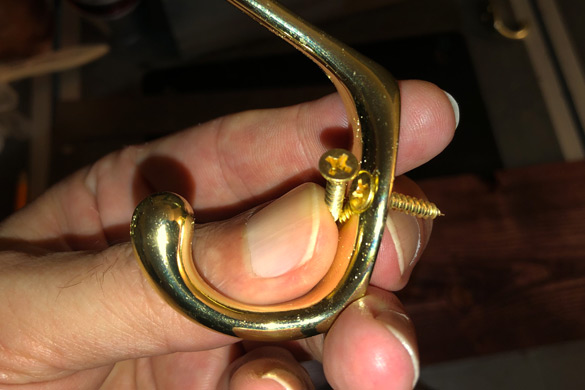
• Coat Hook(s) with Mounting Screws – You will find a multitude of available styles, colors, and sizes. Choose the coat hooks that appeal to your taste, and there is no right or wrong.
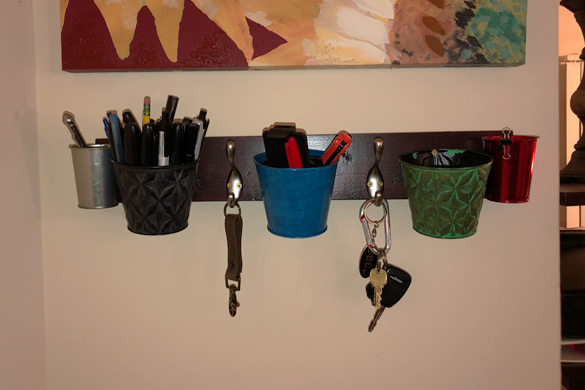
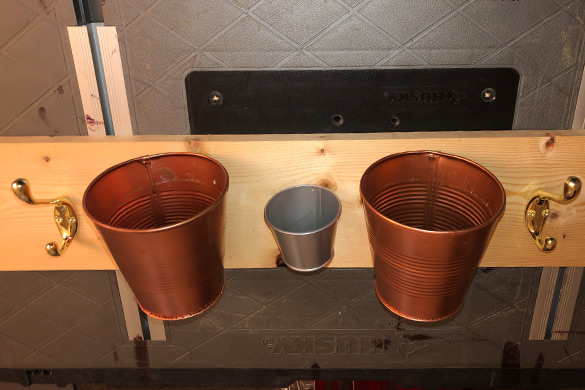
• Potting Tin(s) or Pre-assembled Box(es) with Mounting Screws (optional) – This is where you can get really creative. Nearly any type of lightweight open container can be mounted to your coat rack between the hooks if desired.
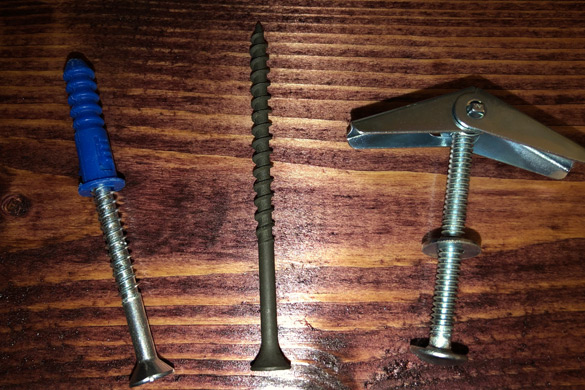
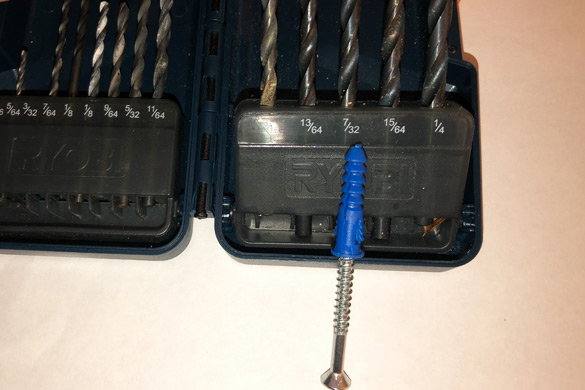
• Fasteners (minimum of two) – 1/8 inch by 3-inch toggle bolts and wings for drywall, 3-inch wood screws for anchoring to a stud, or screws and plastic screw anchors for wood, stone, or masonry (brick) walls. Screws or toggle bolts must be long enough to pass through the wood, drywall, and securely fasten the piece to the wall.
• Washers (one for each fastener) – Washers prevent the head of the screws or toggle bolts from “digging” into or damaging the wood.
The tools you will need include:
• Measuring Tape
• Stud Finder
• Level
• Drill (you will need bits appropriate for the size of the screws or bolts for your fastening system)
• Circular Saw (not required if the wood was cut to size)
• Screwdriver
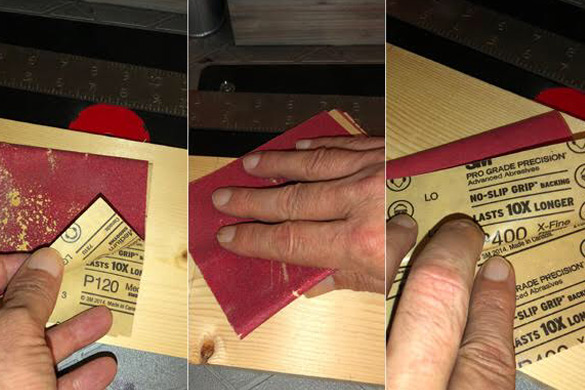
• Sander or Sandpaper – coarse (120 grit) and fine (400 grit) are needed
• Pencil or Pen (for marking mounting locations)
• Vinyl Disposable Gloves
• Painter’s Rag or Sponge (for stain application)
• Paintbrush (for varnish application)
Wall-Mounted Coat Rack – Preparation and Assembly
Preparing and assembling your coat rack is a remarkably easy task. The following will guide you through the process:
Wood Preparation – Take the length of wood you have selected and do the following:
1. If the wood is too long, use a circular saw to cut it to size.
2. Examine both faces of the wood and select the one to face outward.
3. Drill your holes (minimum of two) for your fastening system. If fastening to studs, know the length between studs and match the distance between the holes to that length. For toggle bolts and wings, knowing where your studs are will help you avoid them.
4. Using the rough sandpaper, sand down the face and edges of the wood to remove any protective resin (used for shipping and storage), dents, or uneven edges.
5. Using the fine sandpaper, sand the wood until it is smooth and without any sanding marks.
6. Using a lightly dampened cloth, clean the wood. Make sure there is no sawdust left on the wood.
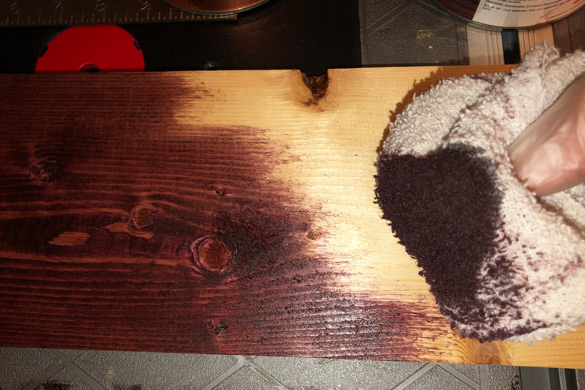
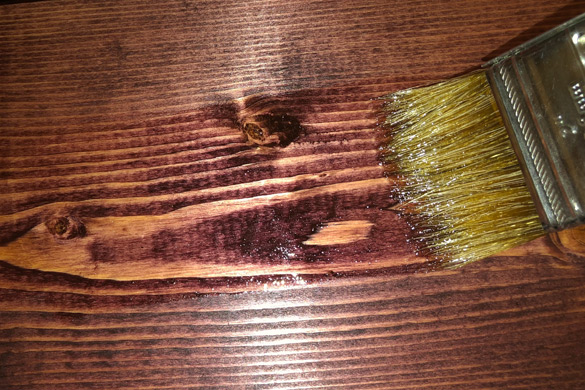
7. Apply a thin, even coat of wood stain to the front, back, and border using a painter’s rag or a sponge (wear vinyl gloves to avoid staining your hands).

8. Once the stain has completely dried (4-5 hours), sand the stained area with fine sandpaper until smooth, If you find that the color is too light, apply another coat of stain and repeat this step until reaching the desired color.
9. Once your wood is stained, dried, and sanded smooth, use your paintbrush to apply a thin, even layer of varnish to the face and border of the wood. (It is not required to apply a finishing coat to the back of the wood).
10. Once the varnish has completely dried (8-10 hours), sand the varnished area with fine sandpaper until smooth, then wipe the wood clean with a lightly dampened cloth, let dry, and apply a second thin and even coat of varnish. Allow the piece another 8-10 hours to completely dry.
Adding the Hooks – As long as you maintain a minimum of 2 inches between each hook or feature, you can add as many as you like. Follow these steps to fasten the hooks to the coat rack securely:
• Use the tape measure to find the center of the board length-wise.
• With the board on a table, place the hooks and tins along the board in the desired arrangement.
• Measure the space between the hooks and adjust them so they have equal spacing across the board.
• Once you’ve arranged them and measured them out, use the mounting holes in the hooks to mark where the screws will be placed.
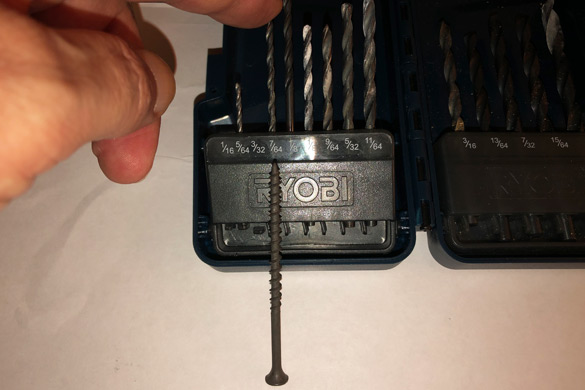
• Remove everything from the board. Using a 1/16 size drill bit, drill a starter hole 1/8 inch deep for each of the holes you marked (this will keep the board from splitting.
• Place the hooks in position one-by-one, manually tightening each screw (if you use your drill to tighten the screws, you risk breaking the board, breaking the hook, or stripping the screw head).
If you are using a tin, box, or container between the hooks, follow the same steps to secure them to the board. These features are an excellent way to cover up the fastening method.
Wall-Mounted Coat Rack – Putting it Up
Depending on how large your coat rack is, you may need someone to assist you with this step. Follow these steps to fasten the coat rack to the wall securely.
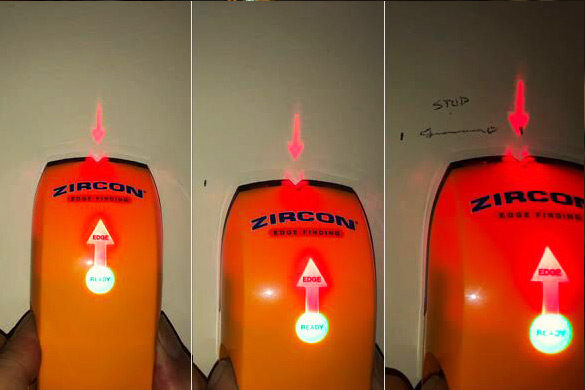
1. Use a stud finder to confirm the position of the studs in the wall (to use them or avoid them).
2. Place your coat rack flush against the wall in the desired permanent location.
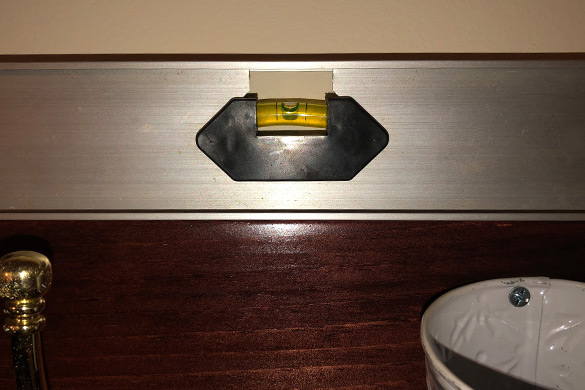
3. Lay the level across the top of the wood. Adjust the wood until the bubble indicator is centered, then mark the wall using the holes in the wood.
4. Drill holes for screws with a drill bit slightly smaller than the size of the screw (for stud mounting).
5. For toggle bolts and wings, you will need to drill holes large enough for the wings to pass through in the closed position.

6. For plastic screw anchors, drill holes with a bit that match the size of anchors, and push the anchors into the holes (it should be a snug fit).
7. Place a washer on each screw or toggle bolt and pass them through the mounting holes in the wood (for toggle bolts, attach the wings to the very of the bolt).
8. Return the coat rack to the selected position on the wall and tighten each screw into place. For the toggle bolts, close the wings and push them through the holes. You should hear a “snap” as they clear the drywall and open back up, then pull them back so the wings are against the backside of the drywall and tighten them up.
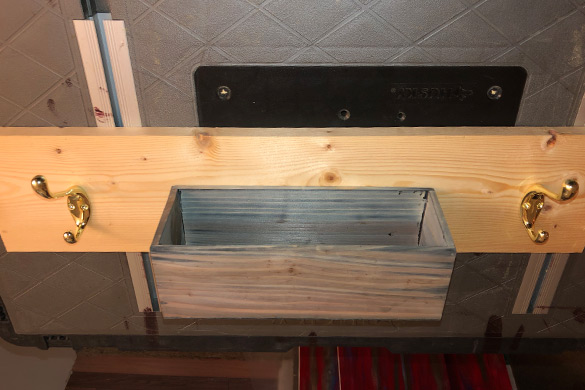
If you decided to use the tins or containers to cover the bolt or screw heads, fasten them into position once the coat rack has been mounted to the wall.
Making Your Own DIY Coat Rack
A great way to personalize the space in your home is to make your own wall-mounted coat rack. Strategically placed by the door, this can be your drop off point for keys, loose change, your wallet or purse, and of coarse your coat.
In this article, you discovered the steps to make your own DIY wall-mounted coat rack with stowing capability.
Save money and add a personal touch to your home by building and mounting your own coat rack.
Sources:
https://web.stanford.edu/~rayan/wood/woodfinishing.pdf
http://www2.ca.uky.edu/HES/fcs/FACTSHTS/HF-LRA.054.PDF
Visit http://www.homeandgardeningguide.com/decorating/diy/ for more DIY decorating articles, resources, and tips.
The post How to Make a DIY Wall-Mounted Coat Rack appeared first on http://www.homeandgardeningguide.com
No comments:
Post a Comment