Wednesday, November 8, 2023

Water Heater Maintenance

Prevent catastrophic flooding damages and costly clean-up from your water heater’s malfunction. Knowing what should be done to maintain your water heater in top working condition will help you get the most from it without it causing a flooding event.

water heater maintenance

homeandgardeningguide.com gathered the following information and tips on how to properly maintain your home’s water heater, preventing its premature failure.

Water Heater Maintenance Tips

The average home’s water heater’s lifespan is 13 years. Some units may only last two or three years, while others can last 20. You can significantly extend your water heater’s lifespan by knowing what contributes to its failure and performing regular maintenance. Consider including the following in your home’s maintenance routine:

1. Check the Pressure Relief Valve

The pressure relief valve is an essential safety feature that releases excess pressure from the water heater tank. To check if your relief valve is functioning correctly, lift the valve handle for a few seconds to allow a small amount of water to flow. If water continues flowing or the valve doesn’t release water, it may need to be replaced.


2. Drain the Tank

With time, sediment can build up in the tank’s bottom, reducing the water heater’s efficiency and potentially causing damage. To remove built-up sediment, drain the tank once a year by turning off the heater’s power or gas, attaching a garden hose to the drain valve, and opening the valve to allow the “hot” water to flow.

Note: Draining water and sediment from your water heater can take 20 to 60 minutes, depending on the tank’s size. Be careful not to damage or break the drain valve when you open and close it. When all the water has drained from the tank, turn the cold water valve at the top of the tank on to thoroughly flush out any residual sediment.

3. Inspect the Sacrificial Anode Rod

The sacrificial anode rod is a water heater component that helps prevent corrosion in the appliance’s tank. Check the anode rod annually to see if it requires replacement. It should be replaced if it’s less than ½ inch thick or heavily corroded.

Note: The sacrificial anode is an essential component of your water heater. It’s a long metal rod made of magnesium or aluminum which extends through the tank’s interior. It works by attracting iron, limestone, or other mineral particles present in the water through an electrochemical process and corrodes instead of the tank.

4. Check the Temperature Setting
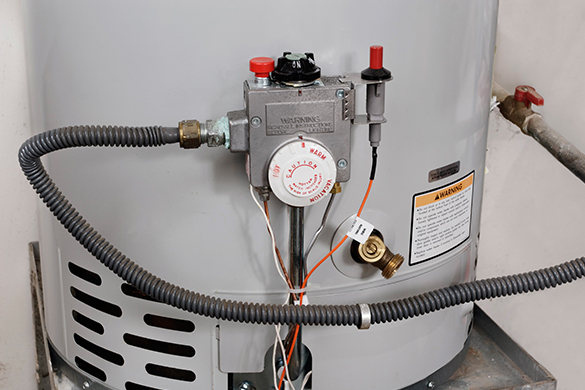
water heater temperature setting

Set the water heater’s temperature to 120° Fahrenheit to prevent scalding injuries and reduce energy consumption. If the temperature is set higher than this, it can also cause the tank to deteriorate faster and shorten the water heater’s lifespan.

Emergency Tip: In case of a scalding accident, cool the burn with cool or lukewarm running water for 20 to 30 minutes (don’t use ice, iced water, creams, or greasy substances like Vaseline or butter). Remove any clothing or jewelry near the burnt area (don’t try to remove anything stuck to the burned skin). Call 9-1-1 for emergency assistance or get to an emergency medical center as quickly as possible.

5. Test the Thermostat

Check the water heater’s thermostat to ensure it’s functioning correctly. You can do this by turning the thermostat up or down and listening for the water heater to turn on or off. If you don’t hear anything, the thermostat may need to be replaced.

6. Inspect the Unit’s Connections

Check the water heater’s water and gas connections to ensure they’re tight and free of leaks. Turn off the water heater’s power or gas if you detect any leaks, and call a professional plumber to fix the issue.

7. Keep the Area around the Water Heater Clean

Ensure the area around the water heater is clean and free from debris (which can obstruct airflow and cause the water heater to work harder than necessary). Clear any combustible materials away from the heater to reduce fire risks.

8. Keep Water Temperature Settings Low

The higher the temperature, the faster sediment will accumulate. Every 20° Fahrenheit increase in water temperature doubles the chemical action causing rust and corrosion.

Tip: Keep the water temperature as low as possible. The typical “hot” tap water temperature is 120° Fahrenheit.

9. Watch for Rust and Corrosion

Leaks can cause water heaters to quickly rust from the outside, preventing drains and pressure valves from properly functioning.

Tip: Check all plumbing connections for leaks and repair or replace them as necessary.

Maintaining Your Water Heater

In this article, you have discovered the water heater maintenance tips to keep your home’s water heater at its peak operating condition.

Understanding what needs to be done to avoid a water heater malfunction or burst will help you keep it in excellent condition and prevent leaks and potential floods.

Improperly maintaining your home’s water heater will expose you to unexpected malfunctions and potential flooding when your home’s water heater bursts.

Sources:
com.ohio.gov/divisions-and-programs/industrial-compliance/boilers/guides-and-resources/residential-water-heater-safety
neo.ne.gov/info/neq/neq-archive/2018-12-dec/dec2018-00.html
labor.maryland.gov/labor/safety/boilhw.shtml
opic.texas.gov/news/water-heaters/
nhsinform.scot/illnesses-and-conditions/injuries/skin-injuries/burns-and-scalds

Visit https://www.homeandgardeningguide.com/repairs/appliance/ for more home appliance articles, resources, and how-to tips.

The post Water Heater Maintenance appeared first on http://www.homeandgardeningguide.com
Tuesday, April 25, 2023

How to Improve Garden Soil

Need help making your garden produce better and more robust plants and vegetables? Understanding how to improve your garden’s soil organically will help you grow plants and vegetables that thrive, bloom better, and produce a more abundant harvest.

Improving garden soil includes adjusting the pH and supporting biodiversity

homeandgardeningguide.com gathered the following information and tips on how to improve your garden soil by adding necessary nutrients, adjusting its pH, and bettering its structure.

Why Improve Your Garden Soil?

Healthy (fertile) soil is crucial for growing strong, vigorous plants that produce abundantly. Whether starting with fresh, high-quality soil or gardening in your native topsoil, improving your soil is an ongoing process.

Note: Improved garden soil aids a plant’s natural resistance to pests and diseases.

Soil Testing

Before improving your garden soil, it helps to know what it is composed of, and you can do this by testing your soil. You can purchase a soil test kit at a local garden center (these kits will provide an immediate analysis of your soil’s pH and nutrient levels). Or, you can find soil testing facilities (local university extensions) that measure pH and provide a detailed soil content analysis. Once you determine your soil’s deficiencies, you can begin the process of improving it.

Ways to Improve Soil Nutrient Content

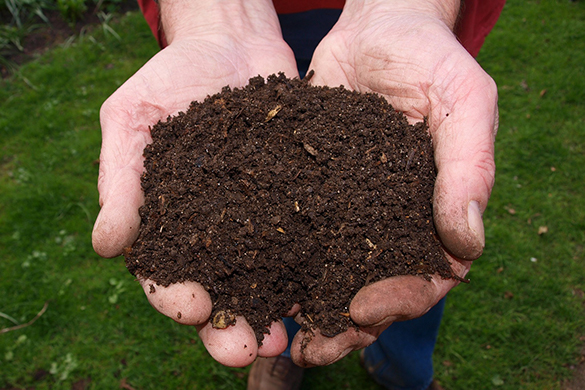
Improving garden soil includes adding organic compost

Gardening is an excellent way to provide fresh, nutritious, low-cost produce for your dinner table. However, if your garden’s soil is not rich in minerals and nutrients, your plants may not grow or produce as well as they could. Consider the following ways to increase your soil’s nutrient content:

Compost – Composting is an excellent way to add nutrients to your garden soil. Compost is made by combining organic materials, like vegetable scraps, leaves, and grass clippings, and allowing them to decompose. The resulting compost is inherently nutrient-rich and can be added to your garden soil to significantly improve its quality. You can use a compost bin or pile in your backyard to make compost.

Manure – Another way to increase your garden soil’s nutrient content is using manure. Manure is exceptionally high in nitrogen, phosphorus, and potassium, all crucial plant nutrients. You can use cow, horse, or chicken manure in your garden.

Note: Fresh manure can burn your plants, so it is best to let it age for several months before using it in your garden soil.

Cover Crops – Also known as “green manure,” are plants that are grown specifically to improve the soil in your garden. Cover crops are typically planted in the fall or winter and allowed to grow until spring, when they are tilled into the soil (adding nutrients and organic matter). Popular cover crops include clover, rye, and buckwheat.

Bone Meal – Bone meal adds phosphorus to your soil, which is crucial for plant root development and flower production. Made from ground-up bones, bone meal can be added to your garden soil to provide a slow-release source of phosphorus.

Note: Bone meal can attract pests, so it should be used sparingly and mixed well into the soil.

Fish Emulsion – This is a liquid fertilizer made from fish waste and a magnificent source of nitrogen essential for plant leafy growth. A fish emulsion can be added to your garden soil as a foliar spray or mixed into the soil.

Tip: Dilute fish emulsion before using it in your garden, as it can be too potent for some plants.

How to Control Soil pH

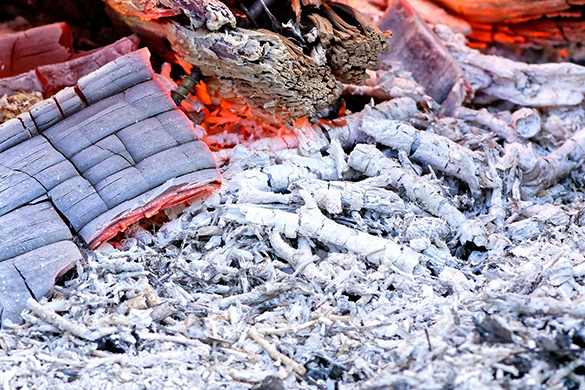
Improving garden soil includes adding wood ash to adjust pH

Your garden soil’s pH helps plants properly absorb nutrients and water. When planting trees or plants in your garden, verify your plants’ recommended soil pH level and adjust the soil accordingly for the best results. Consider the following ways to increase or lower soil pH:

Adding Organic Matter – Compost, manure, and peat moss can lower soil pH. These materials contain organic acids that help make the soil more acidic.

Using Acidic Fertilizers – Fertilizers containing sulfur or ammonium can help lower soil pH. These fertilizers release acidic compounds as they break down, which helps to make the soil more acidic.

Applying Limestone – Limestone is a naturally alkaline substance added to acidic soil to increase its pH. It is recommended to use finely ground limestone for best results.

Using Wood Ash – Wood ash is a natural source of potassium and calcium carbonate, which help raise soil pH. However, wood ash should be used sparingly as it can also contain high salt levels that may damage plants.

How to Improve Soil Structure

Improving garden soil includes planting cover crops in the off season

Soil structure is how individual soil particles (sand, silt, and clay) bind together to form larger aggregates and is an essential factor in determining the vitality, fertility, and productivity of your garden’s soil. Consider the following methods for improving soil structure:

Adding Organic Matter – Organic matter, like compost, manure, or leaf litter, can improve soil structure by increasing the soil’s organic carbon. This, in turn, stimulates beneficial soil microorganism growth, which helps create stable soil aggregates.

Reducing Compaction – Soil compaction can occur when heavy machinery or foot traffic compresses the soil, reducing pore space and severely limiting air, water, and nutrient movement. Reducing compaction through techniques like reduced tillage or avoiding excessive foot traffic can help improve soil structure.

Balancing Soil pH – Soil pH measures soil acidity or alkalinity and can significantly impact soil structure. Too acidic or alkaline soil can reduce soil aggregation, making it harder for plant roots to penetrate the soil. Balancing soil pH by adding lime or other soil amendments can help improve soil structure.

Incorporating Cover Crops – Cover crops are grown specifically to improve soil health. They can help improve soil structure by increasing the amount of organic matter in the soil while reducing compaction. Cover crops can also help suppress weeds, reduce erosion, and improve soil water-holding capacity.

Enriching My Garden Soil

In this article, you discovered ways to improve your garden’s soil by adding nutrients, adjusting its pH, and developing its soil.

Improving your garden soil will help your plants produce more blooms and encourage your vegetable plants to deliver a hardier bounty for you to harvest.

Failing to consistently improve your garden soil will eventually leave it barren, as each crop will deplete its nutrients and structure.

Sources:
extension.oregonstate.edu/gardening/soil-compost/five-ways-home-gardeners-can-improve-soil
extension.psu.edu/soil-management-in-home-gardens-and-landscapes
extension.okstate.edu/fact-sheets/healthy-garden-soils.html
extension.umn.edu/managing-soil-and-nutrients/living-soil-healthy-garden

Visit https://www.homeandgardeningguide.com/gardening-landscaping/maintenance/ for more garden and soil care articles, resources, DIY, and how-to tips.

The post How to Improve Garden Soil appeared first on http://www.homeandgardeningguide.com
Wednesday, February 22, 2023

Tree Lined Driveway – Planting a Colonnade

Looking to give your home a more stately appearance with a tree-lined driveway? Knowing which trees to plant along your driveway will help create a spectacular colonnade while increasing your home’s curb appeal.

Planting a tree lined driveway with several species

homeandgardeningguide.com gathered essential driveway preparation and tree species information about planting trees along your driveway.

Preparation for a Tree Lined Driveway

Before digging the first hole to plant trees along your driveway, you must take steps to protect your driveway from invasive buckling roots. Installing a root barrier will keep tree roots from growing under your driveway, expanding, and buckling the concrete or pavement above. Consider the following when installing a root barrier:

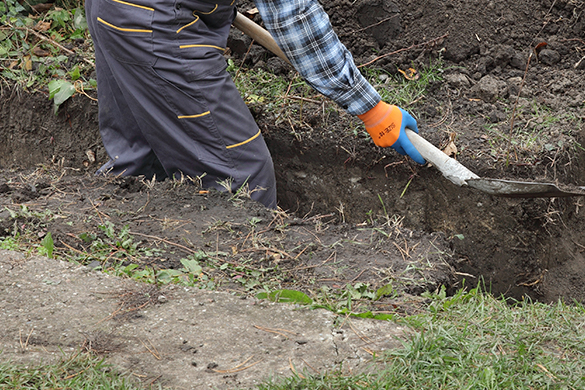
Dig a Trench – Dig a 6 to 10-inch wide by 3-foot deep trench along both sides of your driveway (end to end).

Planting a tree lined driveway requires trenching for a root barrier

Tip: A mechanical trench digger can make the hole faster and narrower. You can rent a trench digger from your local home and garden center.

Insert the Barrier – (For a panel barrier) Slide the first panel into the trench, making sure the top rests 1 inch above the ground (this keeps roots from trying to grow over the barrier). Then place subsequent panels in the barrier, overlapping each other by 1 to 2 inches or interlocking them.

(For a plastic/HDPE barrier) Roll out and cut the barrier to the appropriate length. Again, insert the barrier so the top rests 1 inch above the ground.

Tip: Plastic or HDPE (High-Density Polyethylene) root barrier thicknesses should be between 40 mil and 100 mil. This product is waterproof and puncture resistant. It will not rot, mildew, rust, splinter, or crack.

Fill the Trench – Backfill one-third of the trench with dirt. Pour water into the trench to compact the dirt (this increases the barrier’s effectiveness), then add more dirt and pour water into the trench again. Add more dirt to fill the trench to grade level when the water has soaked in.

Repeat these steps on both sides of your driveway to thoroughly protect it from invasive tree roots.

Tree Selection

Base your tree species selection and spacing on the tree’s projected mature size. Typically, you want to plant a tree far away from a driveway, but with a root barrier installed, you can plant your trees considerably closer. Consider the following tree species:

Leyland Cypress (Cupressus × leylandii) – This is a popular landscape and privacy tree with a broad to tapering form. This evergreen’s lush, dark green foliage provides exceptional scenery along a driveway. This species grows up to 70 feet high and up to a 15-foot spread (USDA zones 6 to 10).

Planting a tree lined driveway with cypress trees

Emerald Green Arborvitae (Thuja occidentalis ‘Smaragd’) – This evergreen has bright green foliage spreading in small, flat fans. The tree grows in a narrow pyramidal shape up to 14 feet high and a 4-foot spread (USDA zones 2 to 7).

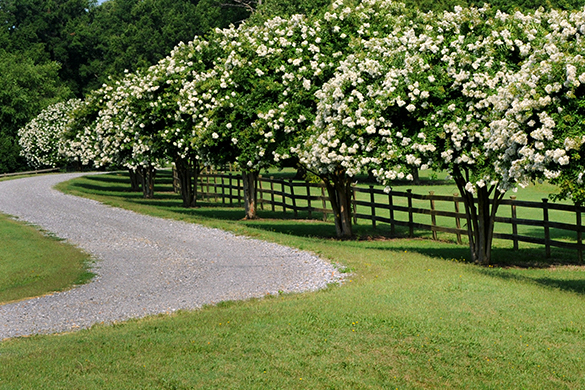
Crape Myrtle (Lagerstroemia) – This species is one of the more colorful colonnade trees, boasting bright blooms and thriving in sunny, warm conditions. The species is drought-tolerant and can grow more than 15 feet high with an equivalent spread (USDA zones 7 to 9).

Planting a tree lined driveway with crape myrtles

Flowering crabapples (Malus) – Line your driveway with color. This tree with larger varieties (40 feet tall with an equivalent spread) and smaller ones (15 to 20 feet tall and wide). Blooms can come in white, light pink, and magenta shades and last for about 5 weeks in spring (USDA zones 4 to 8).

Paper Birch (Betula papyrifera) – Named after its thin, white bark, the paper birch has a mature height of 50 to 70 feet with a 35-foot spread (USDA zones 2 to 7).

Note: This tree turns bright yellow in autumn.

Ginkgo (Ginkgo biloba) – This deciduous shade tree has unique, fan-shaped leaves and reaches a height of 80 feet with a 25 to 35-foot spread (USDA zones 4 to 9).

Tip: Select male trees since the species’ females drop fruit, creating an inconvenient mess.

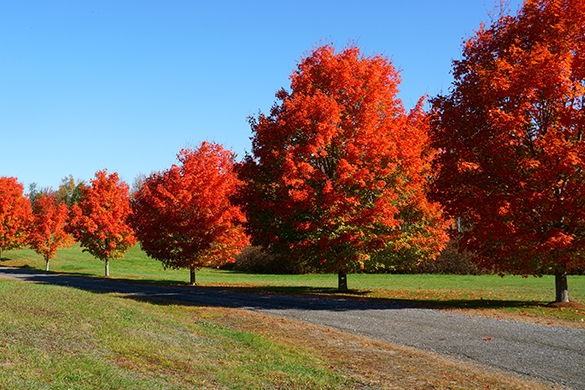
Red Maple (Acer rubrum) – The leaves, stems, and flowers of this species change with the seasons making them an exceptional choice for your colonnade. Red Maples grow to 40 to 60 feet in height, with a 40-foot spread (USDA zones 3 to 9).

Planting a tree lined driveway with red maples

Tree Planting and Spacing

Getting your new tree off to a healthy start will help it mature to its full size and ensure it will provide environmental, economic, and social benefits throughout its lifetime. Tree health and longevity are significantly impacted by how they are planted. Follow these steps to properly plant your driveway trees:

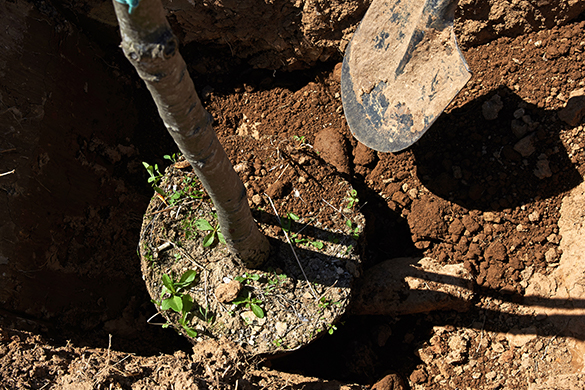
1. The Hole – Dig a shallow, broad planting hole. Holes should be 2 to 3 times wider than the root ball but only as deep as the root ball. Spacing should be about 1-1/2 times the mature tree spread.

Tip: If you want the trees to form an arch over the driveway, they should be the same distance across from each other as their mature spread.

2. The Root Ball – If wrapped, remove any coverings from the root ball and trunk to facilitate free root growth.

Tip: Inspect the tree’s root ball for circling roots, straightening, cutting, or removing them.

3. Put the Tree in the Hole – When placing and adjusting the tree in the hole, maneuver it by the root ball, not the trunk.

A tree lined driveway requires proper tree planting

Tip: The “trunk flare” is where the tree’s trunk expands and becomes roots at the tree’s base. Ensure the trunk flare is partially visible after the tree is planted.

4. Right the Tree – Straighten the tree in the hole before filling it.

Tip: If the planted tree tries to lean, stake it until the roots hold it securely in place (4 to 6 weeks).

5. Fill Your Hole – Fill the hole gently but firmly. Pack soil around the base of the root ball to stabilize it, watering as you fill.

6. Mulch Your Tree – Place a 3-inch layer of mulch around the tree. However, do not pile mulch against the trunk (it creates opportunities for insect infestation and disease).

Mulching is one of the most beneficial practices a homeowner can use for better tree health. Mulches are applied to the soil surface to maintain moisture and improve soil conditions.

Driveway Tree Pruning

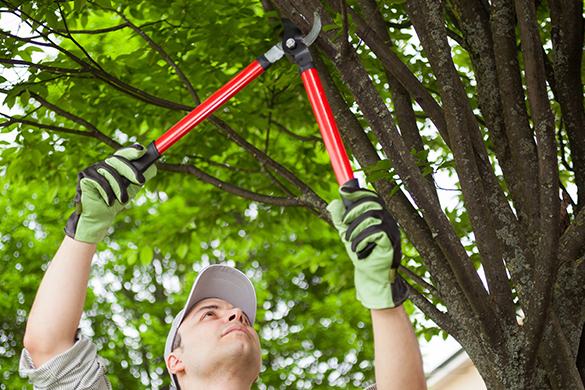
Planting a tree lined driveway includes seasonal pruning

Tree pruning activities should take place in late fall (once your trees are dormant or in late winter (before their growing season) for best results. Consider the following when pruning trees along your drive path:

Prune for Visibility – Ideally, a colonnade tree’s profile should be thin enough to clearly see between the trees, allowing ample airflow and eliminating hiding spots for anyone with bad intentions.

Prune for Safety – Be cautious of any branches extending or drooping over the driveway. Prune them back to avoid vehicle damage or driveway blockage if they fall.

Raise the Canopy – Prune lower branches to create the effect of a taller canopy and increase visibility between the trees.

Thin the Canopy – Remove crowded branches or ones that rub against each other. This allows more sun and air into the canopy while reducing the risk of blowdown or wind snap in severe weather conditions.

Disease and Damage – Prune all diseased or damaged branches any time of the year.

Tip: Trees that overhang driveways and streets must be pruned high enough to provide vehicle clearance.

Tree Lined Driveway 

In this article, you discovered information and tips on planting a colonnade along your driveway, which tree species to plant, and how to keep roots from buckling your driveway.

With proper preparation and the right tree species, you can transform your simple driveway into a stunning one, boosting your home’s charm and curb appeal.

Improperly installing trees along your driveway can result in buckling concrete, costly tree removal, and extensive concrete repairs.

Sources:
treesaregood.org/treeowner/plantingatree
extension.psu.edu/using-trees-and-shrubs-for-privacy-and-wind-screening
plants.ces.ncsu.edu/plants/acer-rubrum/
edis.ifas.ufl.edu/publication/ST671
burke.ces.ncsu.edu/2020/06/donnas-plant-of-the-month-emerald-green-arborvitae/
extension.uga.edu/publications/detail.html?number=C944
extension.colostate.edu/topic-areas/yard-garden/flowering-crabapple-trees-7-424/
naturalresources.extension.iastate.edu/forestry/iowa_trees/trees/paper_birch.html
ucmp.berkeley.edu/seedplants/ginkgoales/ginkgo.html

Visit https://www.homeandgardeningguide.com/gardening-landscaping/trees/ for more tree planting and care articles, resources, DIY, and how-to tips.

The post Tree Lined Driveway – Planting a Colonnade appeared first on http://www.homeandgardeningguide.com
Monday, January 16, 2023

7 Incredible Curb Appeal Ideas

Need help deciding how to increase your home’s visual appeal and value? Knowing which outdoor features can increase your home’s curb appeal will help create an attractive landscape that beautifies your property and increases its value.

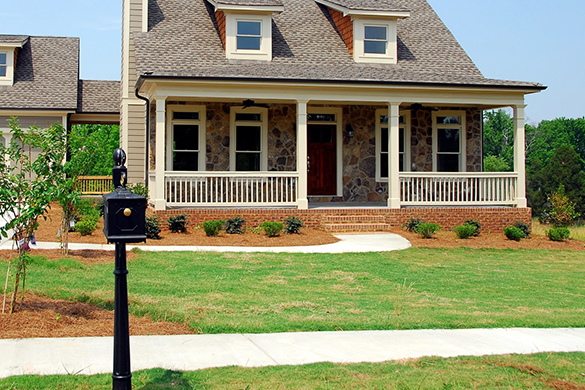
Curb appeal ideas can include keeping your homes appearance clean and trimmed

homeandgardeningguide.com gathered information and ideas below that help you determine ways to increase your home’s aesthetics and property value.

What is Curb Appeal?

Curb appeal refers to a property’s aesthetic attractiveness as viewed from a distance. Several inexpensive or easy projects can improve a home’s curb appeal. Consider the following:

1. Plant a Tree

Curb appeal ideas can include planting trees

Planting a tree is among the most common and inexpensive ways to add curb appeal to your house. Trees planted in your landscape improve air quality, help cut cooling bills with their shade, provide homes for wildlife, and deliver a substantial return on investment (ROI) in exchange for relatively low-cost maintenance.

Whether you plant trees as specimens or along your property line as privacy screening, the appeal flourishing and well-cared-for trees bring to your home is unmatched by other features.

For more information on planting privacy trees, visit homeandgardeningguide.com/gardening-landscaping/trees/5-best-trees-for-privacy/

2. Install a Wood Fence

Curb appeal ideas can include installing a wood fence

Wood fences increase a home’s value by adding a touch of charm to your landscape, inspiring a sense of protection, and clearly defining a property’s boundaries, but they need regular maintenance, sealing, or staining to preserve their beauty and structural integrity.

Tip: Regular care can prevent a wooden fence from being damaged by rot or termite infestation. Read more about caring for wooden fences at homeandgardeningguide.com/repairs/exterior/5-maintenance-tips-wooden-fences/

3. Plant a Garden, Landscape and Hardscape

Curb appeal ideas can include growing a garden

Great gardens possess unmatched beauty and feel good too. The most inspiring gardens are relaxing, easy to move through, bloom throughout the year, and are not too hard to maintain.

In addition to beautiful plant life, consider the pathways around your home, areas leading to plant beds, porches, and even ponds. Paths and structures should be clean, tidy, and simple to navigate.

Tip: A small garden full of drought-tolerant plants around your mailbox is a simple way to easily enhance curb appeal.

4. Install Window Boxes

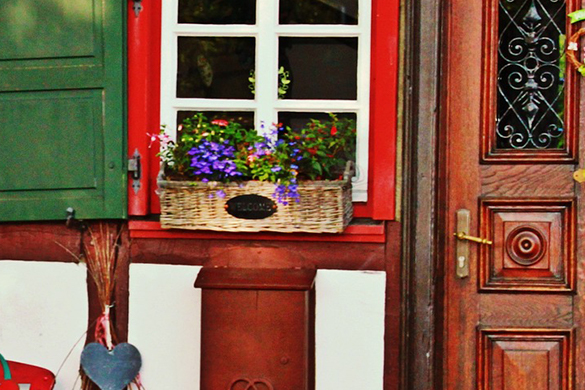
Curb appeal ideas can include installing window boxes

If your house looks bland or colorless, try installing window boxes. These features can be placed on front porch railings and below the home’s windows. Window boxes are typically inexpensive; the flowers and soil may cost more than the box. To add curb appeal, you must maintain the plants and flowers.

Tip: If you want to avoid installing window boxes on your house, consider adding container gardens in pots and arranging them on your porch and front steps.

5. Add Color to Your House

Curb appeal ideas can include painting your home

A fresh coat of paint can significantly increase your home’s curb appeal, and a cohesive color palette will make your home look more refined and well-maintained. You can coordinate your home’s architectural features (like the front door, shutters, trim, railing, and garage door). Keep your color palette restricted to two or three colors (any more colors can make the house look too busy).

Note: Colors do not have to match, and you can pick one trim color and then do a lighter or darker shade for the walls or larger surfaces.

6. Install Landscape Lighting

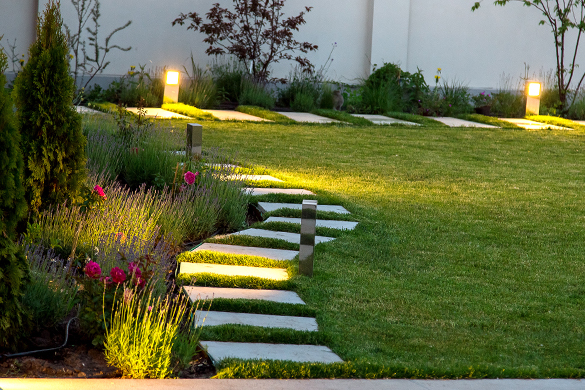
Curb appeal ideas can include installing landscape lighting

Adding landscape lighting to your home and property adds intriguing detail to your beautiful landscaping and home while increasing your home’s curb appeal and value. Landscape lighting accents key landscape features like:

  • Trees
  • Plants
  • Structures
  • Walls
  • Fountains
  • Walkways
  • Driveways
  • Doors
  • Porches/Entryways

A well-planned combination of outdoor lighting (fixtures, colors, intensities, and positions) highlights the architecture and showcases landscaping, creating an appealing and welcoming setting.

7. Keep it Clean

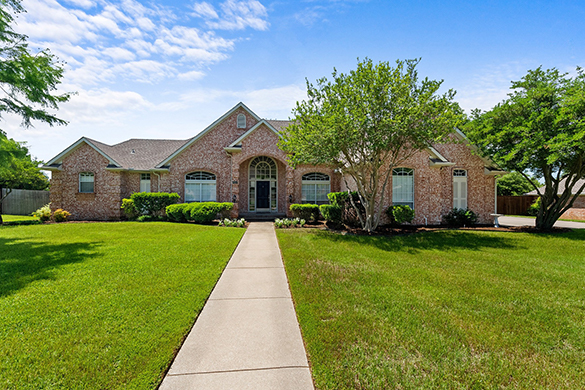
Curb appeal ideas can include keeping your yard well trimmed

Power wash accumulated dirt and grime from your siding, walkway, and driveway.  You can rent a power washer from a hardware store if you don’t own one.

Clean off debris and cobwebs, especially surrounding outdoor light fixtures, windows, and doors, to instantly make your home appear bright and clean.

Note: Occasionally, power washing your home’s structure will expose damaged finishing, gutters, and siding.

BONUS – Install a Fountain

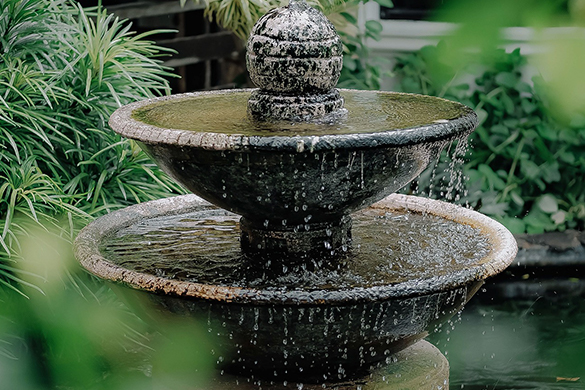
Curb appeal ideas can include installing a water fountain

Water features add sophistication, elegance, movement, and a modern feel to your front yard. For more elaborate features, install a pond or a small waterfall. These features can significantly increase your home’s curb appeal while providing a safe for birds and other wildlife to stop in for a bath or drink the water.

Increasing Curb Appeal

In this article, you discovered several easy ways to modify your landscape that can significantly increase your home’s curb appeal and value.

Improving your property’s exterior appearance helps attract potential buyers when you decide to put your home on the market and set a higher asking price.

Ignoring your property’s curb appeal will leave you in an unfavorable situation when trying to generate interest in your property and securing your asking price.

Sources:
extension.unh.edu/blog/2021/04/annual-perennial-blooms-cut-flower-gardens-foam-flower-audio
newswire.caes.uga.edu/story/5761/curb-appeal.html
extension.missouri.edu/publications/g6905

Visit www.homeandgardeningguide.com/gardening-landscaping/ideas/ for more lawn and landscape care articles, resources, how-to tips, and DIY ideas.

The post 7 Incredible Curb Appeal Ideas appeared first on http://www.homeandgardeningguide.com

Friday, December 16, 2022

How to Attract Birds to Your Yard

Tired of not knowing exactly how to attract birds to your yard and garden? Knowing how to adjust your yard’s features to serve birds’ basic needs will help you create an environment for them to socialize, mature, and nest freely.

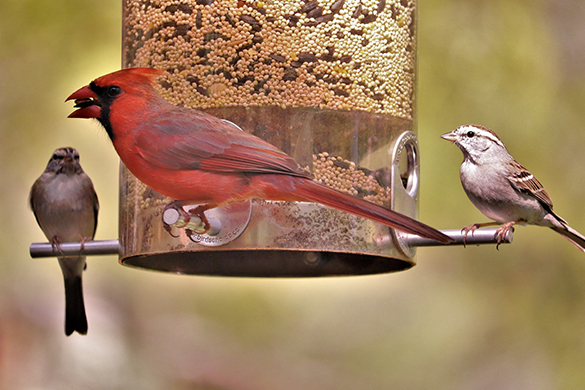
Ways of attracting birds include installing seed and grain feeders

homeandgardeningguide.com gathered the following information to help you create a safe place for multiple bird species to visit and flourish.

Attracting Birds to Your Yard

The easiest way to attract different bird species to your yard is by offering a variety of food sources, providing fresh water, installing native grass and plants, planting fruit-bearing trees, and growing shrubs in varying heights and densities to promote an appealing, safe habitat for local and migrating birds to forage, roost, and nest in. Consider the following additions and adaptations to your yard’s features:

Plant Native Grasses, Plants, Shrubs, and Trees

Before planting your garden or developing your landscape, you should investigate local, native plants in your hardiness zone. Planning your yard with bird-friendly plants that flower at different times of the year will effortlessly attract various bird species through the flowering season. Planting early bloomers will provide a food source for early summer migrants, while planting late bloomers will attract birds leaving later. By doing this, you are providing sustenance for resident birds as well.

Note: The most effective way to encourage a variety of birds to your yard is to plant multiple native tree, shrub, and flower species as possible.

Provide a Year-Round Water Source

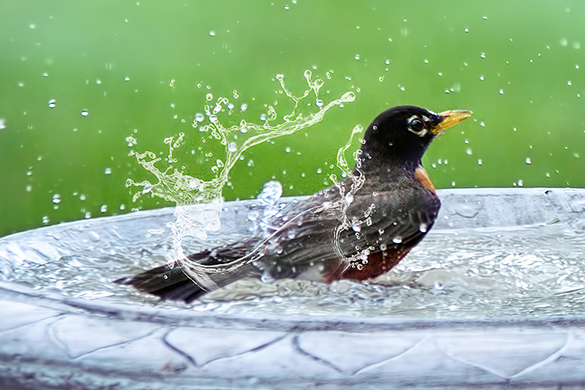
Ways of attracting birds include installing a bird bath

A freshwater source is necessary to maintain a bird population. This water source needs to be shallow (2 to 3 inches) and cleaned or replaced regularly. Running water, like a shallow fountain, is ideal. To minimize predation, the water feature should be elevated or in the middle of an open area. Birds require access to fresh water year-round, so keeping it available during the winter is crucial.

Tip: A pond, fountain, bird bath, or simple feature with water trickling over a large stone will draw birds in for a cool drink or refreshing bath.

Eliminate Commercial Insecticide Use in Your Yard

Using organic or natural insect deterrents helps wildlife thrive. Insects are the primary food source for many bird species and are an essential nourishment source for young birds.

Note: The more bird species you attract to your yard, the fewer insect pest problems you will have.

Provide Fresh Nectar for Hummingbirds

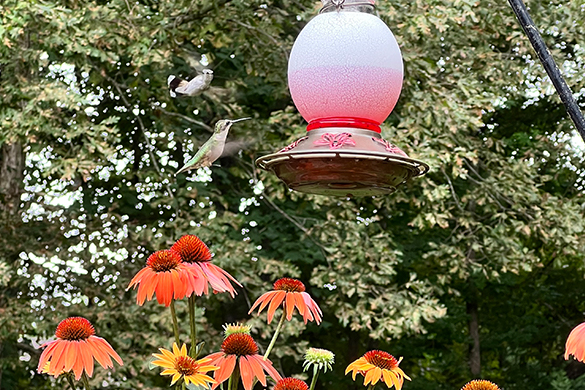
Ways of attracting birds include putting up feeders

Install hummingbird feeders at eye level or higher in partially shaded areas. You can make a sugar solution (one part white sugar to four parts water). Boil the solution briefly to sterilize it and dissolve sugar crystals. Feeders should be washed and sanitized every few days with very hot water and kept clean to prevent mold or bacteria growth.

Supply Food in Feeders

Simple bird feeders are excellent sources of supplemental nourishment when food is not readily available. They also enhance your bird-watching opportunities.

Note: Birds eat a variety of food. Some consume seeds, while others eat insects, berries, and fruit. Seed-eating species may nest through the winter, eating from your feeder if you provide seeds they like. But birds that thrive on insects and fruit will migrate to locations where those foods are plentiful.

Strategically Locate Bird Feeders to Prevent Window Collisions

Protect birds from window collisions by not placing any feeders or attractions within five feet of windows. Window treatments, hanging plants, and decorations outside windows will help prevent bird strikes.

Tip: Attach fruit tree netting outside windows as a barrier to deflect birds from the glass.

Keep Dead Trees

Ways of attracting birds include leaving snags and logs in your yard and garden

Dead trees (fallen trees or sturdy snags) provide cavity-dwelling spaces for birds to raise offspring and as a food source to collect insects. Many species will seek shelter from bad weather and predators inside these hollowed-out trees.

Note: Be careful so as to not preserve an infected tree that’s capable of transmiting disease to others in your yard.

Keep a Brush Pile in Your Yard

A brush pile in a secluded corner of your yard will significantly benefit birds dependent on ground-level features. Start your pile with sturdy logs, topping it with smaller branches, leaves, and clippings. Some birds hunt, roost, or nest in brush piles.

Keep Cats Indoors

Ways of attracting birds include keeping cats indoors

Cats kill birds, often pouncing on ground-feeding birds and those stunned by window collisions. Outdoor cats are particularly dangerous to birds in the spring when fledglings are on the ground.

Attracting Birds

In this article, you discovered valuable information and tips to help you attract and nourish multiple bird species to your yard and garden.

Attracting birds to your yard and garden provides purpose to its components and features while supporting local wildlife with a safe space, water, and nourishment.

Stop guessing why birds won’t visit, and learn the exact ways to attract birds into your yard.

Sources:
extension.uga.edu/publications/detail.html?number=C976
ucanr.edu/datastoreFiles/268-824.pdf
nwf.org/Garden-for-Wildlife/Wildlife/Attracting-Birds
audubon.org/news/11-tips-feeding-backyard-birds

Visit www.homeandgardeningguide.com/gardening-landscaping/ideas/ for more lawn care articles, resources, how-to tips, and DIY ideas.

The post How to Attract Birds to Your Yard appeared first on http://www.homeandgardeningguide.com
Monday, November 21, 2022

5 Best Trees for Privacy

Prevent curious neighbors or unwanted attention from invading your privacy and outdoor living space. Knowing which privacy trees to plant on your property line will help you protect your loved ones’ privacy.

homeandgardeningguide.com gathered the following species information, mature size, and soil information for some of the best privacy trees.

1. Arborvitae (Thuja)

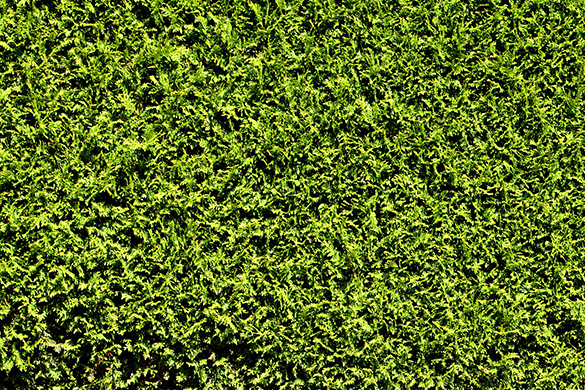
Excellent tree species for privacy include arborvitae

Arborvitaes have reddish-brown bark, and their soft, scale-like leaves are arranged into fan-shaped branchlets. This variety of evergreens is mildly aromatic and soft to the touch. This species is most often planted as a privacy screen or for hedges.

Mature Size – This species grows to a height of 40 to 60 feet and a 10 to 15-foot spread at maturity.
Spacing – Planting your arborvitae approximately ten feet apart is wise. If you plan to prune the plant to maintain a size or shape, make necessary adjustments when spacing your arborvitae.
Soil Requirements – Arborvitae adapt to a range of soil types, including red clay, but the species prefer moist, well-drained loam.
Water Needs – Approximately 10 gallons of water per inch of the tree’s diameter is recommended for established trees growing in well-drained soil.
Hardiness Zone – 3 through 8

2. Leyland Cypress (Cupressus leylandii)

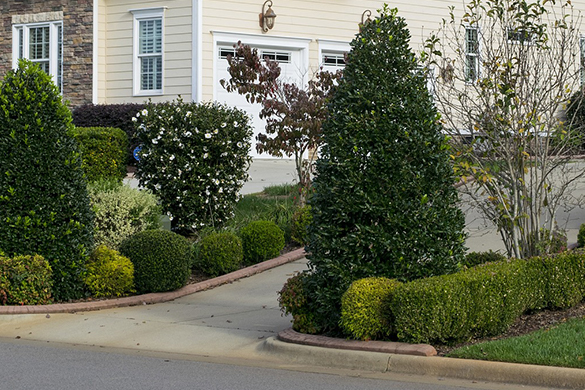
Excellent tree species for privacy include leyland cypress

The Leyland Cypress is an evergreen, vigorous tree, densely foliaged to the base. This species has a pleasing mid-green or blue-green foliage made up of soft, scale-like needles.

Mature Size – This species grows to a height of 60 to 70 feet and a 15 to 25-foot spread at maturity.
Spacing – Cupressus leylandii should be spaced 6 to 10 feet apart for privacy.
Soil Requirements – This species grows well in acidic, alkaline, loamy, moist, sandy, well-drained, and clay soils.
Water Needs – A Leyland cypress requires a few months to get established and needs frequent deep waterings during this time. Once established, give the tree 1 gallon of water per week for each foot of height.
Hardiness Zone – 6 through 10

3. Juniper (Juniperus)

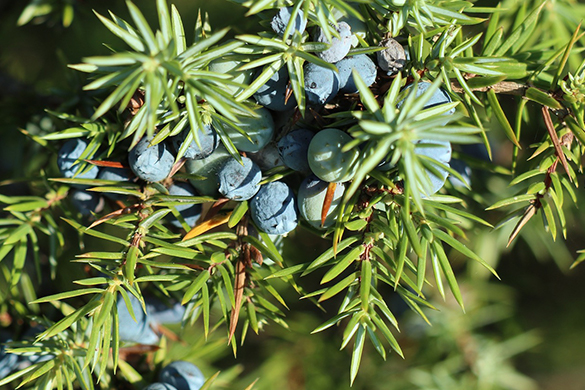
Excellent tree species for privacy include juniper

Junipers can vary in size and shape (depending on the variety) from tall trees to columnar or low-spreading shrubs with long, trailing branches. This species is evergreen with needle or scale-like foliage.

Mature Size – This species grows to a height of 1 to 50 feet and a 6 to 20-foot spread at maturity.
Spacing – For a privacy screen, space your juniper trees five feet apart or three feet apart for a solid wall.
Soil Requirements – Junipers are very tolerant of dry, clay soils, and many varieties will thrive in sand. All varieties require well-drained soil.
Water Needs – Once established, Juniper trees require little to no supplemental watering. In fact, they are more likely to contract soil-born diseases from overwatering.
Hardiness Zone – 2 through 7

4. Weeping Willow (Salix babylonica)

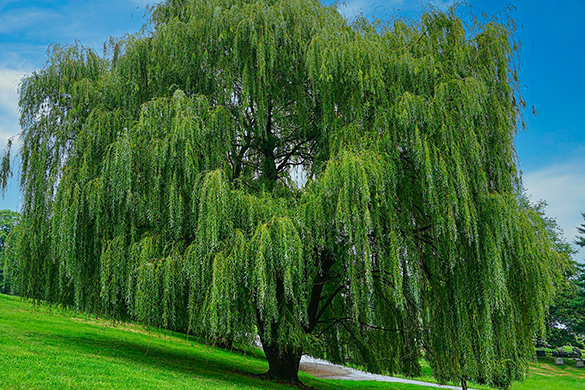
Excellent tree species for privacy include weeping willow

Weeping willow trees are popular for their dramatic, elegant, weeping appearance. Their long, graceful branches fall into an arch, creating a rounded canopy gently grazing the ground. Their flowing, narrow leaves are light green on top, with silver undersides until they turn yellow in fall.

Mature Size – This species grows to a height of 30 to 40 feet and a 30 to 35-foot spread at maturity.
Spacing – For a privacy screen, space your weeping willow trees 40 to 50 feet apart.
Soil Requirements – Weeping willows grow well in acidic, alkaline, loamy, moist, rich, sandy, well-drained, and clay soils.
Water Needs – You should water a weeping willow weekly for the first year after planting. Once established, you only need to water it enough to keep the soil from drying out.
Hardiness Zone – 6 through 8

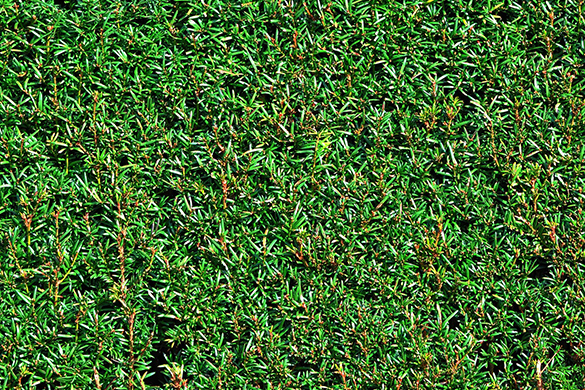
5. Yew (Taxas baccata)

Excellent tree species for privacy include yew

Yew trees are densely branching, evergreen trees with big trunks. The tree’s bark is thin, scaly, and brown, coming off in small flakes. Its leaves are dark green, leathery, and narrow with a pointed tip. Once called the “graveyard tree” in England, the yew has a reputation for sudden death in both people and livestock.

Mature Size – This species typically grows to a height of 20 to 30 feet and a 15 to 20-foot spread at maturity.
Spacing – Space your yew trees 5 to 10 feet apart for a privacy screen. This species grows considerably more densely when planted closer together.
Soil Requirements – This species thrives in rich, loamy soil with a neutral to slightly alkaline pH. It also does surprisingly well in heavy clay. However, planting sites that trap water can quickly result in root rot.
Water Needs – Yews require minimal watering. Only during drought conditions would weekly watering be recommended.
Hardiness Zone – 3 through 8

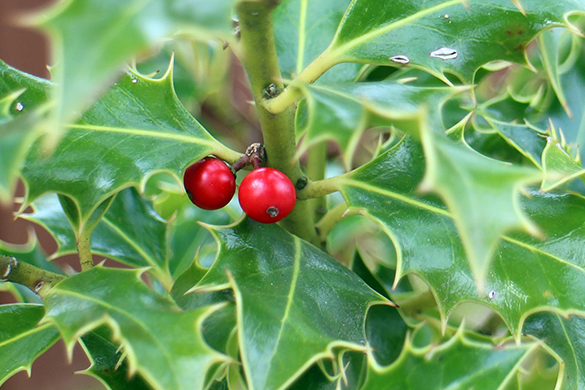
BONUS – Holly (Ilex)

Excellent tree species for privacy include holly

The American holly is an evergreen tree with stout, stiff branches and spine-tipped leaves. Female trees produce small, bright red berries. Holly is well known for its tough, spiny leaves; the long, needle-like spines successfully deter browsing wildlife.

Mature Size – This species typically grows to a height of 40 to 50 feet and a 20 to 40-foot spread at maturity.
Spacing – It is recommended to plant hollies 5 to 6 feet apart to create a dense hedge or privacy screen.
Soil Requirements – Hollies prefer loamy, well-draining soil kept evenly moist.
Water Needs – Once established, the bush should get 2 inches of water weekly.
Hardiness Zone – 3 through 11

Privacy Tree Species

In this article, you discovered species, mature size, and soil information for some of the top-rated, most popular, and fastest-growing privacy trees.

Planting privacy trees allows you to enjoy your outdoor activities without worrying if your neighbors are spying on your every move. These trees will also provide much-needed shade and protection from severe weather.

Without privacy trees your outdoor activities and family’s personal lives will be in the open for curious neighbors and potential criminals to watch.

Sources:
ipm.ucanr.edu/PMG/GARDEN/PLANTS/arborvitae.html
edis.ifas.ufl.edu/publication/ST671
hgic.clemson.edu/factsheet/juniper/
bellarmine.edu/faculty/drobinson/weepingwillow.asp
ipm.missouri.edu/MEG/2020/6/yews-DT/
gardeningsolutions.ifas.ufl.edu/plants/trees-and-shrubs/shrubs/holly.html

Visit http://www.homeandgardeningguide.com/gardening-landscaping/trees/ for more tree planting and care articles, resources, DIY, and how-to tips.

The post 5 Best Trees for Privacy appeared first on http://www.homeandgardeningguide.com
Monday, October 17, 2022

3 Practical Garage Conversion Ideas

Without the best ideas and knowing if converting your garage is worth the money, you may make a costly mistake. Having clever conversion ideas, knowing the impact on your home value, and knowing how to convert your garage into a functional space can save you from costly permitting, land disturbance and construction fees.

A garage conversion can be one of the fastest and most economic ways to add extra usable space to your home

homeandgardeningguide.com gathered the following information, ideas, and tips on converting your garage into a living or workspace.

Is It a Good Idea to Convert Your Garage?

Yes and no. A garage conversion can alleviate the pressures a growing family faces by moving specific activities to that designated space. However, builders, designers, and inspectors agree that converting your garage into a living space will not add significant value to your home.

Tip: A garage conversion is typically not a good idea if you’re planning to sell your home in the next few years.

Note: Before embarking on any remodeling project, research local ordinances and consult your HOA to make sure there are no restrictions on altering your garage’s use.

Is It Cheaper to Convert a Garage or Build an Extension?

While building and construction costs vary based on your location and plans, you can expect a garage remodel to cost a mere fraction of what you’d spend to build a home addition from the ground up.

Garage Conversion Ideas

One of the greatest things about converting your garage is the extra space you have to work with (in a way that’s relatively fast, unobtrusive, and inexpensive). Properly converting a garage is hardly fast or cheap; doing the job correctly can easily cost thousands of dollars in materials and upgrades and may take weeks to complete. Consider the following garage conversion ideas:

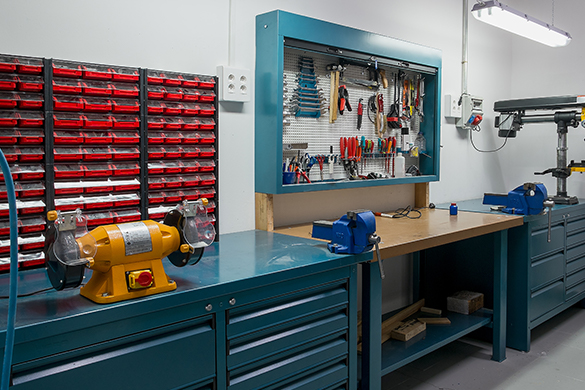
1. Workshop Conversion

A garage conversion can be one of the fastest and most economic ways to add a fully functional workshop

Convert your garage into a functional workshop by first completely clearing out the garage. An empty garage lets you plan what you need and where you need it. Lay out cabinets, counters, shelves, drawers, pegboards, and bins for an optimized workshop with a place for everything and zero clutter.

Step 1 – Sketch the layout for each workshop wall
Step 2 – Completely empty the garage
Step 3 – Refinish the flooring or install new flooring
Step 4 – Level, Mount, and Hang wall and base cabinets
Step 5 – Install countertops
Step 6 – Level, Mount, and Hang shelves
Step 7 – Mount your pegboards
Step 8 – Move your tools, equipment, and supplies into their new space

Tip: You will need an open floor plan to safely operate larger machines like circular or miter saws, and you should reserve storage space for raw materials like lumber and pipes.

2. Gym/Fitness Center Conversion

A garage conversion can be one of the fastest and most economic ways to add a personal fitness center to your home

It is quite common that garage spaces are converted into a home fitness center. The “home gym” has increased in popularity with the recent social distancing policies and public distress over the COVID-19 pandemic. A garage can be converted into a home fitness center by:

Step 1 – Sketch the fitness center layout
Step 2 – Clear out the garage
Step 3 – Insulate and finish the walls
Step 4 – Determine what type of flooring you want (hardwood, padded, etc.)
Step 5 – Install heating, cooling, and air circulation options
Step 6 – Hang cabinets and place racks for equipment storage
Step 7 – Increase the room’s lighting
Step 8 – Invest in quality equipment

Tip: Hang mirrors strategically around the fitness center to watch your progress and make the room feel larger.

3. Home Office Conversion

A garage conversion can be one of the fastest and most economic ways to add office space to your home

If you want to save space and add a home office to your home, your garage is the answer. Since garages are enclosed and developed spaces, they can serve as an ideal area to install your home office. Consider the following steps:

Step 1 – Sketch the office layout
Step 2 – Clear out and thoroughly clean the garage
Step 3 – Insulate and finish the walls (a fresh coat of paint will work wonders)
Step 4 – Determine what type of flooring you want (hardwood, carpet, tile, etc.)
Step 5 – Add or adjust electrical outlets (you may need an electrician for this)
Step 6 – Install heating, cooling, and ventilation options
Step 7 – Verify wi-fi, hardwired, and landline connections
Step 8 – Install appropriate lighting (ambient, reading, video, etc.)
Step 9 – Arrange desks, cabinets, shelving units, etc.

Tip: Requirements for your office size, equipment, and layout will depend mostly on your profession and what you need to efficiently meet your goals.

What Permission or Permit Do I Need to Convert My Garage?

Planning permission and building or construction permits are not usually required for a simple garage conversion, providing the work is internal and does not involve enlarging or changing the building’s footprint. If you intend to convert a garage into a separate house or housing unit (regardless of who will occupy it), then planning permission and permits may be required, no matter what work is involved.

Garage Conversion

In this article, you discovered information, ideas, and tips to help you convert your garage into a practical workshop, gym, or office space.

Converting your garage will allow you to move specific activities into a newly appropriated space, allowing you and your family to feel less restricted or cramped.

Ignoring your converted garage’s potential can leave you paying for expensive expansions or additions, contractors, and building or land disturbance permits.

Sources:
magazine.columbia.edu/article/designing-your-home-working-home
housingworksri.org/Learning-Center/Learning-Center-Overview/Accessory-Dwelling-Units-ADU/Garage-ConversionType
cfsms.org/index-993.html
health.clevelandclinic.org/how-to-create-a-home-gym-youll-actually-use/

Visit http://www.homeandgardeningguide.com/improvement/garage-conversion/ for more garage conversion articles, resources and tips.

The post 3 Practical Garage Conversion Ideas appeared first on http://www.homeandgardeningguide.com