Avoid the wasted effort and embarrassment of poorly hung, peeling, or crooked wallpaper. Knowing how to properly install wallpaper will help you take on the DIY project of adding tranquility and coziness to your home’s decor.
homeandgardeningguide.com gathered the following essential information and tips on DIY wallpaper selection, sizing, and installation.
How Much Wallpaper Do I Need?
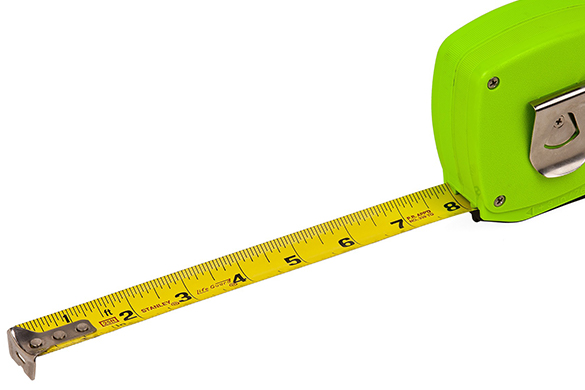
This fundamental question is relatively simple to answer. Use the following to determine how much wallpaper to acquire (all measurements should be made in feet and inches):
Walls – Measure walls from corner to corner and again from floor to ceiling. Multiply those two figures to ascertain the wall’s square footage. Repeat this process for each wall, then add the totals to give you the amount of space to cover.
Tip: When wallpapering your ceiling, multiply the floor’s width by its length.
Windows and Doors – Use the same measurement formula to determine the size of windows and doors (length X width = SqFt). Subtract these totals from the wall space you just calculated.
The Wallpaper – Divide your totals by 25. This will give you the number of standard wallpaper rolls to purchase.
Tip: Unless you are purchasing custom-made wallpaper, standard rolls cover 25 square feet.
Hanging Your Wallpaper
Once you’ve selected your wallpaper and acquired enough to cover the intended room(s), follow these steps to hang your wallpaper like a pro:
Fixtures – Before you can start, you should remove the switch and plug plates, light fixtures, appliance controls (thermostat), etc. This will give you an unimpeded space to work.
Prepare the Walls – Prime your walls by patching any holes, correcting significant irregularities, and sanding them smooth.
Tip: If your walls were previously painted with an enamel-based paint, sanding them will help the wallpaper’s adhesive (glue) more efficiently hold it in place.
Cut the Wallpaper – Roll out the wallpaper on your work surface and cut several pieces to the wall’s length with a utility knife.
Tip: Allow an extra 5 to 6 inches of length when sizing your wallpaper. You will trim this off later in the process.
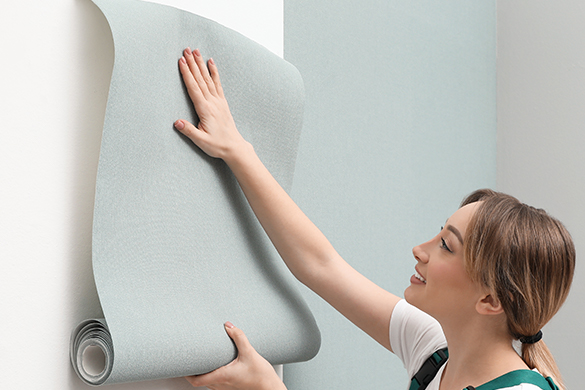
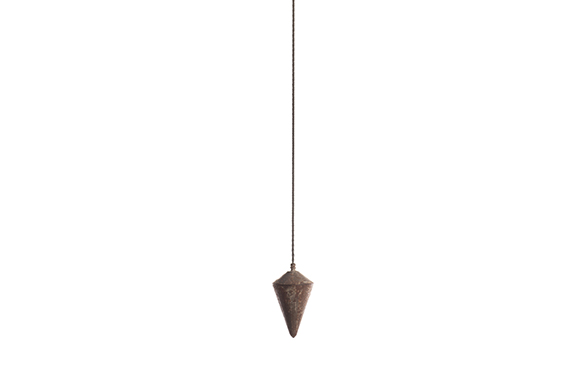
Mark a Plumb Line and Hang the First Sheet – Mark a plumb line on the wall, apply a thin layer of wallpaper adhesive to the area or remove the wallpaper’s protective sheet covering the self-adhesive side and begin applying it to the wall. Adhere the wallpaper on the wall with the heels of your hands, aligning the wallpaper’s edges with the plumb line.
Note: If you are using wallpaper adhesive, paste, or glue, make sure it is “tacky” or beginning to cure before applying the wallpaper.
Tip: Mark a plumb line before beginning a new section or room to ensure that the first application goes up “squared.” This first application will serve as a guideline for all other sheets.
Smooth the Surface – After hanging each sheet, use a soft-bristle wallpaper brush to smooth the surface. Repeat this process for each application, ensuring the sheets are properly adhering to the wall.
Corners – When you reach a corner, use your straightedge and utility blade to cut off any excess paper. If the piece (strip) you removed is more than 2″ wide, use it to start the next wall. Draw a plumb line 1/4″ less than the width of the strip, and hang it.
If you are left with any gaps, use caulk to fill them in. Use a damp cloth to remove any excess.
Tip: Always cut your sheets to size when reaching a corner. Trying to fold a sheet into a corner can result in an uneven, sloppy-looking application.
Outlets and Switches – Hang your wallpaper over any outlets and switches (ensure the power is turned off for this). After 20 minutes, cut an X over the covered outlets and switches, then trim the excess paper away.
Bubbles – After finishing your wallpapering, you may encounter a few bubbles. Don’t try to remove them; they should disappear after a few days.
Wallpaper Selection Tips
The wallpaper you select can make a room appear larger, warmer, cozier, and brighter (or the contrary) and cover or distract from your wall’s imperfections. Consider the following elements:
Style – large patterns with dramatic colors lend to a formal appearance. Small, open, and evenly spaced patterns like polka dots or patterned stripes give a fun or whimsical appearance. Be patient when searching for the perfect wallpaper style – the choices are practically infinite.
Tip: Use borders to give the eye a place to start and end.
Color – Color quickly establishes a room’s mood. Select patterns with cool colors, like green, blue, or purple, to make a room visually larger and the ceiling appear elevated. Soft cool colors suggest relaxation and tranquility, while intense cool colors are fresh and somewhat dramatic. Warm colors include red, yellow, and orange shades. These colors tend to make people feel warmer.
Tip: Blue is the only primary color entirely within the cool spectrum. Greens assume some of yellow’s attributes, and purples or violets assume some of red’s attributes.
Light – In a dark hallway or windowless room, look for wallpaper that reflects light around the room and consider patterns with smooth surfaces, which brighten the room by reflecting its light.
Tip: Darker colors absorb light, making walls appear closer and the room significantly smaller.
Mix and Match – A room without any pattern can quickly disenchant, while a room with too many patterns can trigger a deep restlessness. When combining stripe, floral, or plaid patterns in a room, select repeating patterns (color or style).
Selecting the “right” wallpaper style, color, and pattern can be a profoundly personal venture and should be done with patience to avoid any potentially regrettable decisions.
Wallpaper Hanging
In this article, you discovered answers to frequently asked questions, information, instructions, and tips to help you hang your wallpaper like a professional.
Knowing how to properly hang wallpaper will help you completely personalize your living area, creating the perfect atmosphere inside your home.
Without knowing the steps, your DIY wallpaper hanging project can turn into a disaster and wasted time.
Sources:
nyiad.edu/design-articles/interior-design/hanging-wallpaper
wallcoverings.org/page/SurfacePrep
Visit http://www.homeandgardeningguide.com/decorating/ for more DIY articles, resources, and tips.
The post DIY Wallpaper Installation appeared first on http://www.homeandgardeningguide.com
No comments:
Post a Comment