Don’t be embarrassed by cluttered tables and counters anymore. A wall-mounted shelf offers an organized home to pictures, vases, collections, or whatever you want to display.
homeandgardeningguide.com gathered information and simple instructions on how to make a DIY wall-mounted shelf with variations to fit any empty wall space, and anyone’s taste.
Wall-Mounted Shelving – Location and Wall Space Requirement
The wall space you choose to mount a shelf in will determine quite a few aspects of the shelf you will build. Take the following into consideration:
Purpose – What will this shelf be used for?
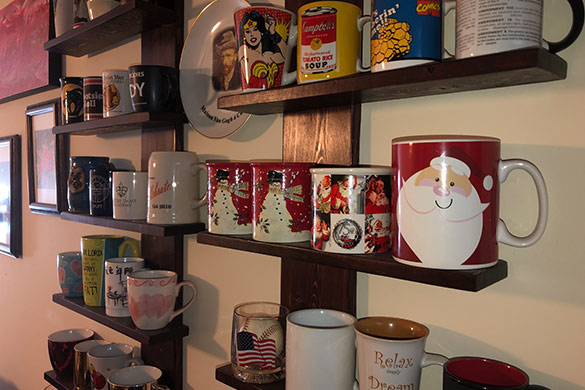
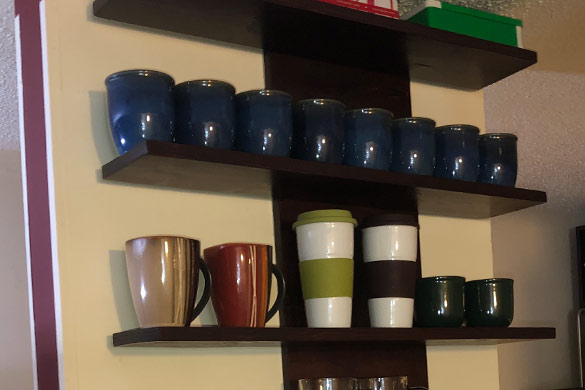
• If you are trying to display a light collection such as coffee mugs or picture frames, you can use narrow shelves with lighter anchoring.
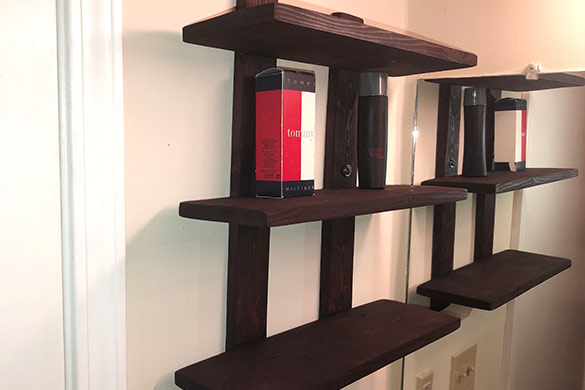
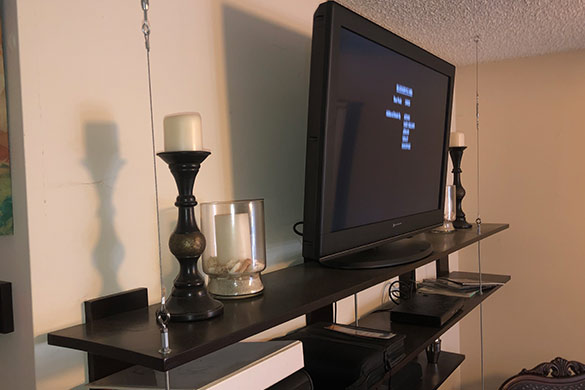
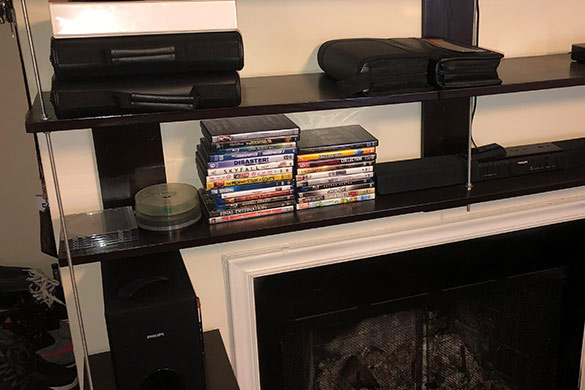
• Heavier items like lamps, books, or even TV’s will require broader, more reinforced shelves with more aggressive anchoring.
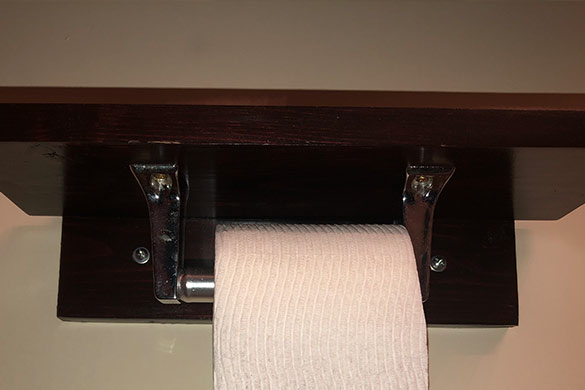
• Durability is needed when these shelves are used for repositioning towel racks or toilet paper dispensers.
• Filling “dead space.” Rather than hanging a picture or painting, you may decide that some random shelves will nicely fit in that space.
Four or six-inch wide shelves are recommended when you are using them to display or store lightweight objects (less than fifteen pounds combined). Ten to twelve-inch wide shelves can be used (with reinforcement) for objects exceeding fifteen pounds combined.
Location – Where this shelf will be mounted will determine many factors like its length, width, and height.
• The location should ideally be between five feet and six feet from the floor. This keeps the shelves out of reach of small children. If the shelves are part of a system (surrounding a fireplace, etc.), make sure lower shelves are well-anchored or removed to eliminate potential hazards.
• If the location is in your hallway, these shelves should be placed higher up (six to seven feet) and be narrow (three to four inches wide). Shelves in hallways quickly become obstacles, especially in the dark.
• Your shelves can be as long as the space you have for them. The longer you make your shelves, the more support they will require. For the following mode of assembly, there should be either support, anchoring, or both for every two feet of shelf space.
• A wall-mounted shelf has several surfaces that can be utilized. You can set objects on the top, with hooks or mounts, you can hang objects beneath them, and with hooks from the side, they can be used to hold keys, lanyards, headphones, charging cords, etc. If you decide to use your shelf to its fullest capacity, make sure the space around it is enough to accomplish your goal.

Wall-Mounted Shelving – Design and Specifications
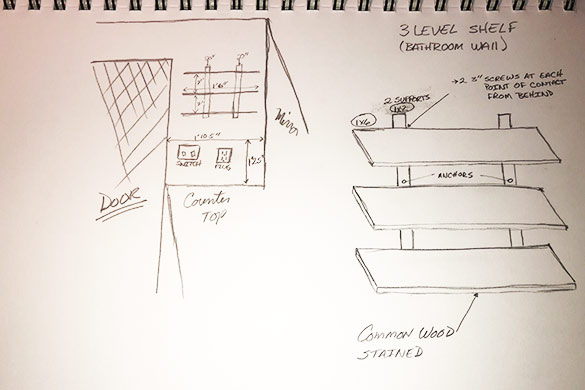
Whether you are an artist or not, you can sketch out how you want your shelves. This step will leave you with a guide to follow. As your project comes together, it will likely deviate from your drawing, but this is expected. consider the following:
1. Start by determining how many shelves you want
2. Draw the space they will be in (draw it large for numbers and notes)
3. Write the dimensions of that space along the top and down the side (see image below)
4. Draw a line or a 3D representative image of your shelves in that space
5. Write the length of the shelves along the shelves (especially if lengths vary)
6. Draw in where the supports will be (we are using simple back supports in this example)
7. Designate where the shelves will be anchored to the wall
8. Determine whether you will use drywall anchors, studs, or a combination of them
Add as much detail to your drawing as you can; type of wood, stain or paint color, etc. The more detail you include, the easier your project will be.
Wall-Mounted Shelving – Supplies
The selection of wood, anchoring system, stain, etc. are all a question of what you are most comfortable working with. The following are suggestions to help you make informed decisions when acquiring the supplies to construct your shelf:
Wood – You can use just about any type of wood for this project, from common wood to cedar, walnut, or even reclaimed wood. Note the following:
1. Use your design as a guide to get the right length and width of the shelves.
 2. The thicker the wood is, the heavier it will be, potentially requiring a more reliable anchoring system.
3. Most home supply centers will cut the wood to size for you (if needed).
 4. If your shelf is intended to be a decorative piece, look for grain patterns and knots in the wood for aesthetic enhancements.
Tip: The recommended minimum thickness of your shelf should fall between 1/2” to 3/4” to avoid eventual sagging.
Wood Stain – If you are looking to showcase a natural wood appearance, you can skip this. However, if you are trying to make your shelf complement other wood pieces in your home, snap a picture of the piece and compare the color options.
Tip: Wood comes in different shades. Take this into account if you are trying to make a color match with another piece (exact matches are tough to make).
Varnish – There are several types of varnish or finishing coats that will add shine and texture (or both) to your wood. Choose the finish best suited for your style and home’s décor.
Structural Support – There are a few options you can use to support or even reinforce your shelf or shelves. Consider the following:
• For smaller, lightweight shelves, you can use vertical 1 x 3 or 1 x 4 lengths of wood and attach the shelves to the wood using 3” deck screws from behind.
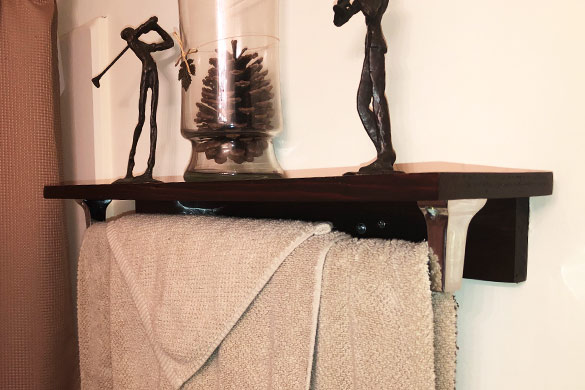
• For a more traditional, simpler support system, use shelf brackets that attach to the underneath of the shelf, and anchor to the wall (there is an infinite number of styles and colors to choose from). Note the weight rating on the brackets you select, some can only support ten pounds while others can support several hundred pounds.

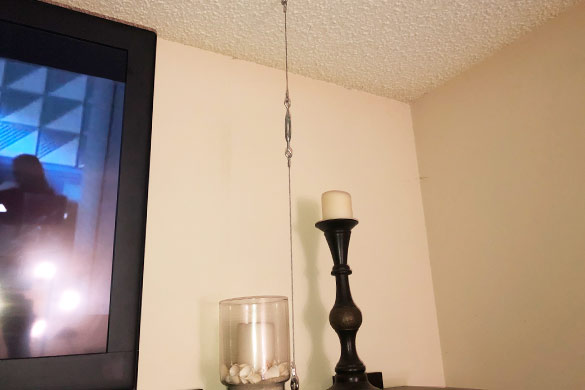
• For shelves that must support extra weight, use a wire and turnbuckle support system in conjunction with the primary support system. These wires can be attached to the outer edge of the shelf, then to the wall or the ceiling. Tightening the turnbuckle on each wire will keep the shelf from sagging or collapsing.
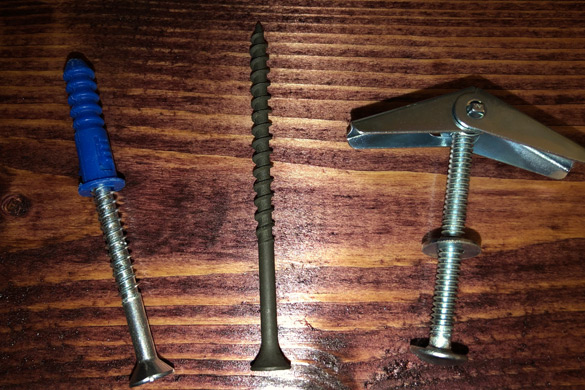
Anchoring Systems – When hanging your shelf on a wall that uses traditional wooden framing and drywall, the following anchoring systems will help you secure your shelf to the wall:
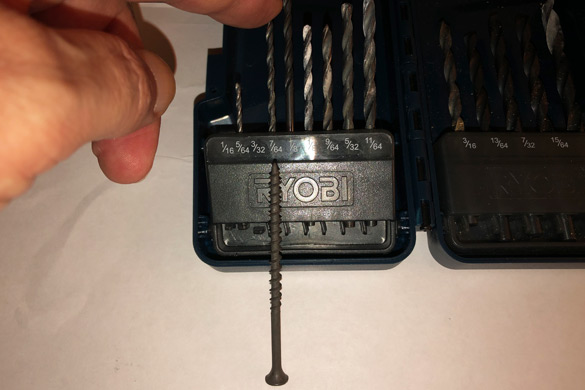
• Three-inch fastening screws can be used when fastening directly into a stud behind the drywall. This is one of the most reliable anchoring options you have. These screws can be found in silver, gold, black, etc.
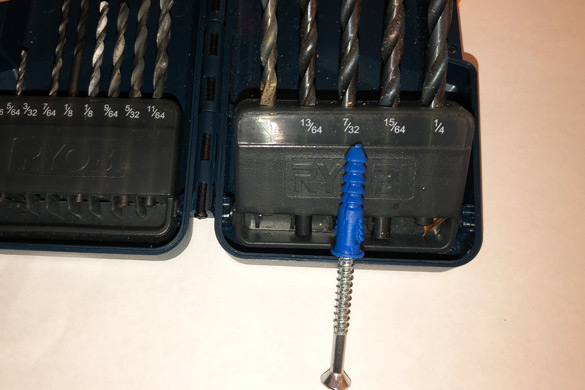
• Screws and plastic push-in or screw-in anchors can be used when a stud cannot be found. They are also ideal for wood, stone, or brick walls. The weight capacity of anchors varies, the sturdiest of them are the screw in type with a capacity of up to fifty pounds each.
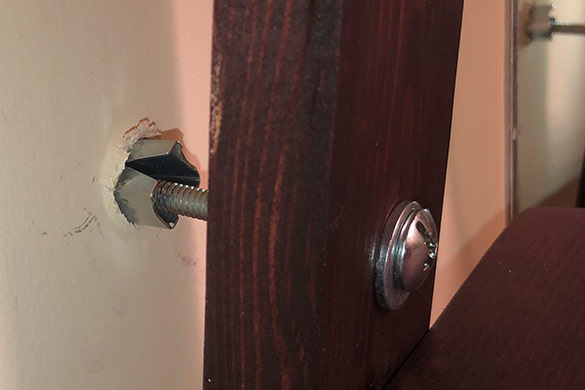
• Toggle bolts and wings work well to anchor heavier shelves in the absence of wall studs. Make sure the bolts are long enough to pass through the structural support and the drywall, allowing the wings to spring open behind the drywall.
Tip: Use washers with your anchoring system when possible or needed. Washers prevent the head of a screw from digging into the wood.
Wall-Mounted Shelving – Tools
This is a relatively easy project. The tools listed below will help you assemble and mount your shelf:
• Measuring Tape or a Long Ruler
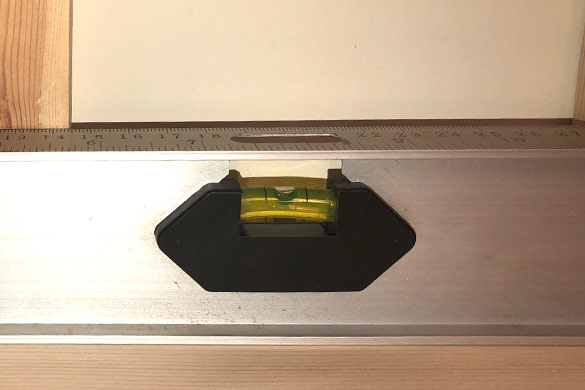
• Level
• Stud Finder
• Pencil or Pen (for marking mounting locations)
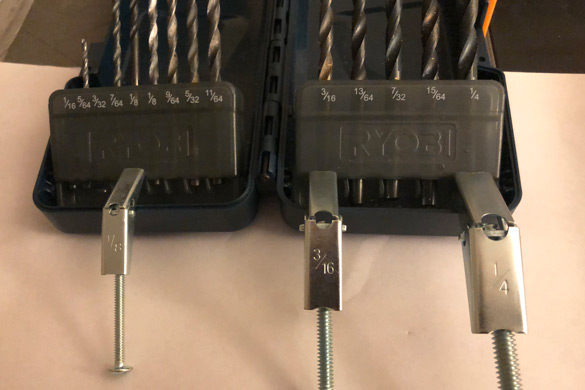
• Drill (you will need bits appropriate for the size of the screws or bolts for your support and fastening systems)
• Circular Saw (not required if the wood was cut to size)
• Screwdriver (flathead or Phillips depending on the screws you use)
• Sander or Sandpaper – coarse (120 grit) and fine (400 grit) are needed
• Vinyl Disposable Gloves
• Painter’s Rag or Sponge (for stain application)
• Paintbrush (for varnish application)
Tip: Verify that you have the needed tools before beginning your project. If any are missing, make a shopping list and visit your local hardware store or home supply store.
Wall-Mounted Shelving – Preparation and Assembly
Wood Preparation – Take the wood components you have selected and do the following:
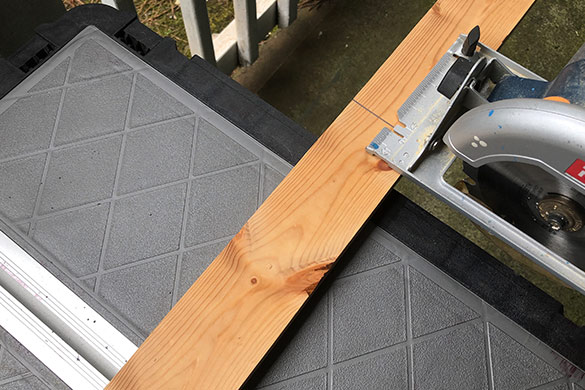
• Unless done for you, use a circular saw to cut the wood to size.
• Examine the faces of the wood and select the most appealing ones to face outward.
• Drill holes in the locations for your support and fastening systems. If fastening to studs, determine the length between studs (typically sixteen or twenty-four inches between studs) and match the distance between the holes of the anchoring system. Likewise, for toggle bolts and wings, knowing where your studs are will help you avoid them.
• Assemble your shelf to make sure everything fits and drilled holes are where they should be, then take it apart and begin the wood finishing steps.
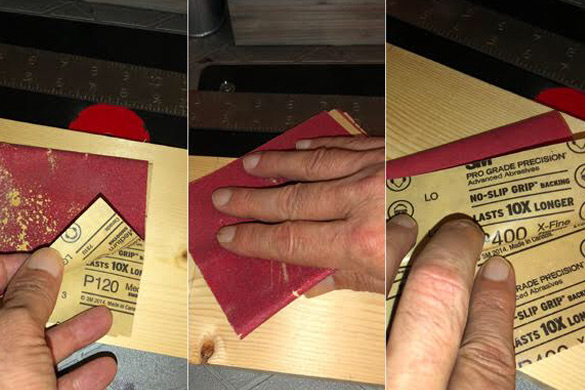
• Using the 120 grit sandpaper, sand the face and edges of the wood to remove any protective resin (used for shipping and storage), dents, or uneven edges.
• Using the 400 grit sandpaper, sand the wood until it is smooth and without any sanding marks. Scratches and other defects in the wood become very evident when applying stain and varnish. Be thorough.
• Using a lightly dampened cloth, clean the wood, removing any residual sawdust. Make sure there is no sawdust or debris left on the wood.
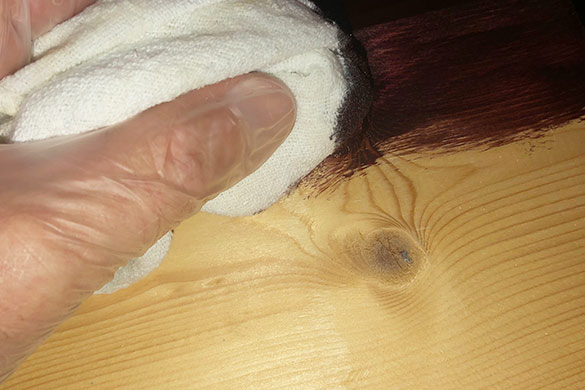
• Apply a thin, even coat of wood stain to the top, bottom, and border of the wood using a painter’s rag or a sponge (wear vinyl gloves to avoid staining your hands).
• Prop the wood upon screws drilled into your work table or a piece of wood fastened to it. This way, you can stain and varnish all sides at once if you choose.
• Allow the stain to completely dry (4-5 hours), sand the stained area with 400 grit sandpaper until smooth. If you find the color is too light, apply another coat of stain and repeat this step until you reach the desired color. If the stain is too dark, apply wood bleach to lighten it (wood bleach is a potent chemical – follow the container’s instructions and use caution).
• When your wood is satisfactorily stained, dried, and sanded smooth, use your paintbrush to apply a thin, even layer of varnish to the top, bottom, and border of the wood.
• Once the varnish has completely dried (8-10 hours), sand the varnished area with 400 grit or finer sandpaper until smooth. Then wipe the wood clean with a lightly dampened cloth, let dry, and apply a second thin and even coat of varnish. Allow the piece another day to completely dry.
Tip: It is of the utmost importance that you allow each coat of wood stain, varnish, or other finishing to completely dry before applying the next coat. If you don’t allow these coats to completely dry, you will end up with a soft tacky to the touch finish that may take years to fully dry, if it ever does.
Note: If you are going for the bare wood look, no staining or varnishing are needed. The sanding step should still be done to create a smooth surface.
Wall-Mounted Shelving – Assembly and Anchoring
Depending on the size and weight of your shelf or shelves, you may need assistance for the safe and proper mounting of your project. The following will help you get your shelf up and functional:
Assembly – Once completely dry, put the pieces of your shelf together. Make sure you have tightened all screws and that any vertically attached wood supports are firmly fastened to your shelves.
Tip: If you used stain, varnish, or paint on any surfaces that will be flush to the wall, allow extra time for them to dry. If they are mounted moist, they will adhere to the wall creating significant difficulties in removing them.
Anchoring – The following steps will help you get your shelf leveled and securely anchored to your wall:
• Use a stud finder to locate the position of the studs in the wall (to use them or avoid them).
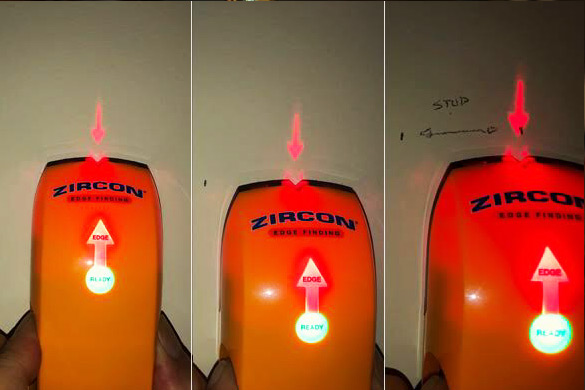
• Place your shelf/shelves flush against the wall in the desired permanent location.
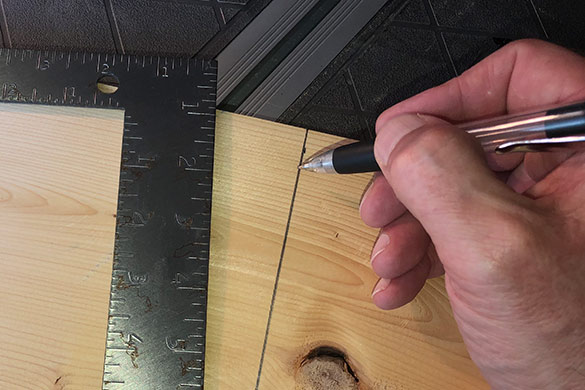
• Lay the level across the top of the shelf and adjust it until the bubble indicator is centered, then mark the wall using the holes in the support system.
•Attach wires and turnbuckles to the shelves and the wall or ceiling. The turnbuckles can be unscrewed to attach the wire of one half to the shelf and the other half to the wall or ceiling.
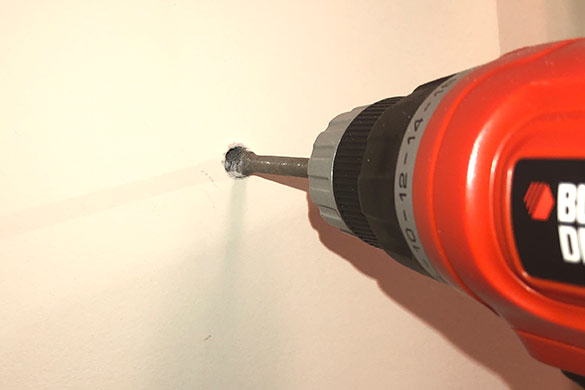
• Drill holes for screws with a drill bit slightly smaller than the size of the screw (for stud mounting).
• For toggle bolts and wings, you will need to drill holes large enough for the wings to pass through the drywall in the closed position.
• For plastic screw anchors, drill holes with a bit that match the size of the anchors and push them into the holes (it should be a snug fit). For screw-in anchors, the hole can be small, as they will expand it while being screwed in.
• Place a washer on each screw or toggle bolt and pass them through the mounting holes in the wood (for toggle bolts, attach the wings to the end of the bolt after passing through the wood).
• Return the shelf/shelves to the selected position on the wall and tighten each screw into place. For toggle bolts, close the wings and push them through the holes in the drywall. You should hear a “snap” as they clear the drywall and open back up, then pull them back, so the wings are against the backside of the drywall and tighten them up.
• If you are using wires and turnbuckles, this is where you connect the turnbuckles and tighten them until the wire is drawn tight.
Tip: Start tightening screws or toggle bolts from the top-down, verifying the shelves are level as you go. Then sit back and enjoy your accomplishment!

Making Your Own Wall-Mounted Shelves
In this article, you discovered steps and pro tips on how to build and mount your own DIY wall-mounted shelves.
By making your own shelves, you are in complete control of their size, their look, and, more importantly, their weight capacity.
Save money while adding a personal touch to your space and giving a home to the items cluttering your counters and tables.
Sources:
rochester.edu/ase/studentessentials/fabrication/articles/off-the-shelf-parts-you-should-know.html
web.stanford.edu/~rayan/wood/woodfinishing.pdf
www2.ca.uky.edu/hes/fcs/FACTSHTS/HF-LRA.054.PDF
Visit http://www.homeandgardeningguide.com/decorating/diy/ for more DIY articles, resources, and tips.
The post DIY Wall-Mounted Shelving appeared first on http://www.homeandgardeningguide.com
No comments:
Post a Comment